Use sample data to train a univariate (single prediction column) time series experiment that predicts minimum daily temperatures.
When you set up the experiment, you load data that tracks daily minimum temperatures for the city of Melbourne, Australia. The experiment will generate a set of pipelines that use algorithms to predict future minimum daily temperatures. After generating the pipelines, AutoAI compares and tests them, chooses the best performers, and presents them in a leaderboard for you to review.
Data set overview
The Mini_Daily_Temperatures data set describes the minimum daily temperatures over 10 years (1981-1990) in the city Melbourne, Australia. The units are in degrees celsius and the data set contains 3650 observations. The source of the data is the Australian Bureau of Meteorology. Details about the data set are described here:
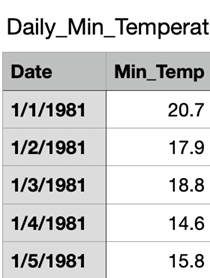
-
You will use the
Min_Tempcolumn as the prediction column to build pipelines and forecast the future daily minimum temperatures. Before the pipeline training, thedatecolumn andMin_Tempcolumn are used together to figure out the appropriate lookback window. -
The prediction column forecasts a prediction for the daily minimum temperature on a specified day.
-
The sample data is structured in rows and columns and saved as a .csv file.
Tasks overview
In this tutorial, you follow these steps to create a univariate time series experiment:
Create a project
Follow these steps to download the Mini_Daily_Temperatures data set from the Samples and create an empty project:
- From the navigation menu
, click Samples and download a local copy of the Mini_Daily_Temperatures data set.
- From the navigation menu
, click Projects > View all projects, then click New Project.
- Click Create an empty project.
- Enter a name and optional description for your project.
- Click Create.
Create an AutoAI experiment
Follow these steps to create an AutoAI experiment and add sample data to your experiment:
-
On the Assets tab from within your project, click New task > Build machine learning models automatically.
-
Specify a name and optional description for your experiment, then select Create.
-
Select Associate a Machine Learning service instance to create a new service instance or associate an existing instance with your project. Click Reload to confirm your configuration.
-
Click Create.
-
To add the sample data, choose one of the these methods:
- If you downloaded your file locally, upload the training data file, Daily_Min_Temperatures.csv, by clicking Browse and then following the prompts.
- If you already uploaded your file to your project, click Select from project, then select the Data asset tab and choose Daily_Min_Temperatures.csv.
- If you downloaded your file locally, upload the training data file, Daily_Min_Temperatures.csv, by clicking Browse and then following the prompts.
Configure the experiment
Follow these steps to configure your univariate AutoAI time series experiment:
-
Click Yes for the option to create a Time Series Forecast.
-
Choose as prediction columns:
Min_Temp. -
Choose as the date/time column:
Date.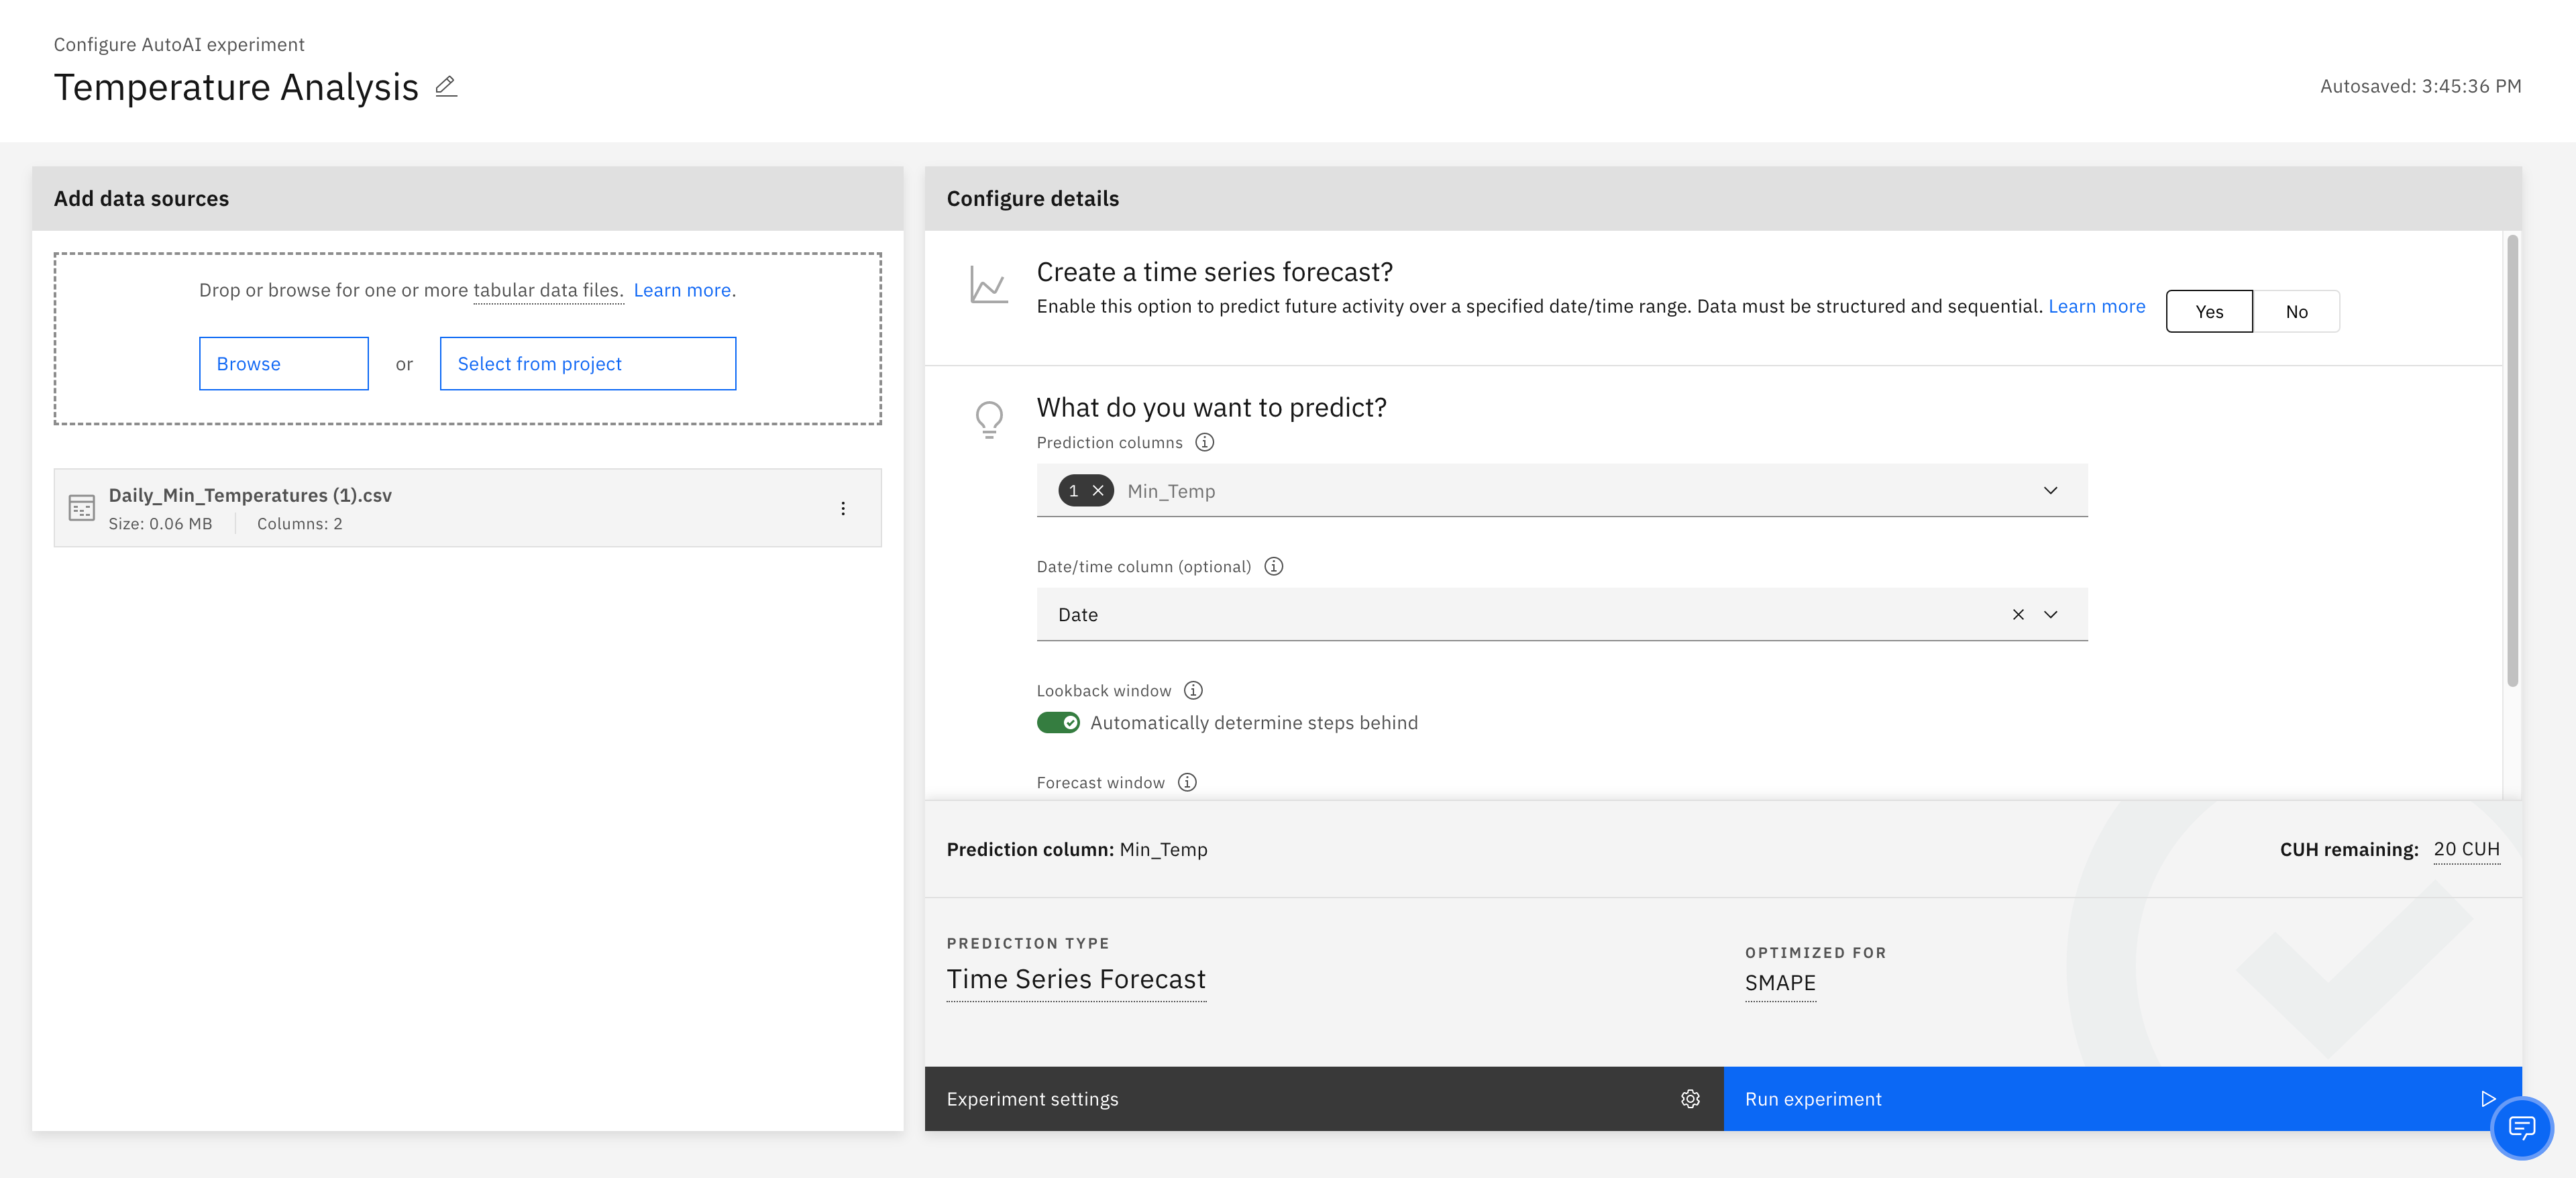
-
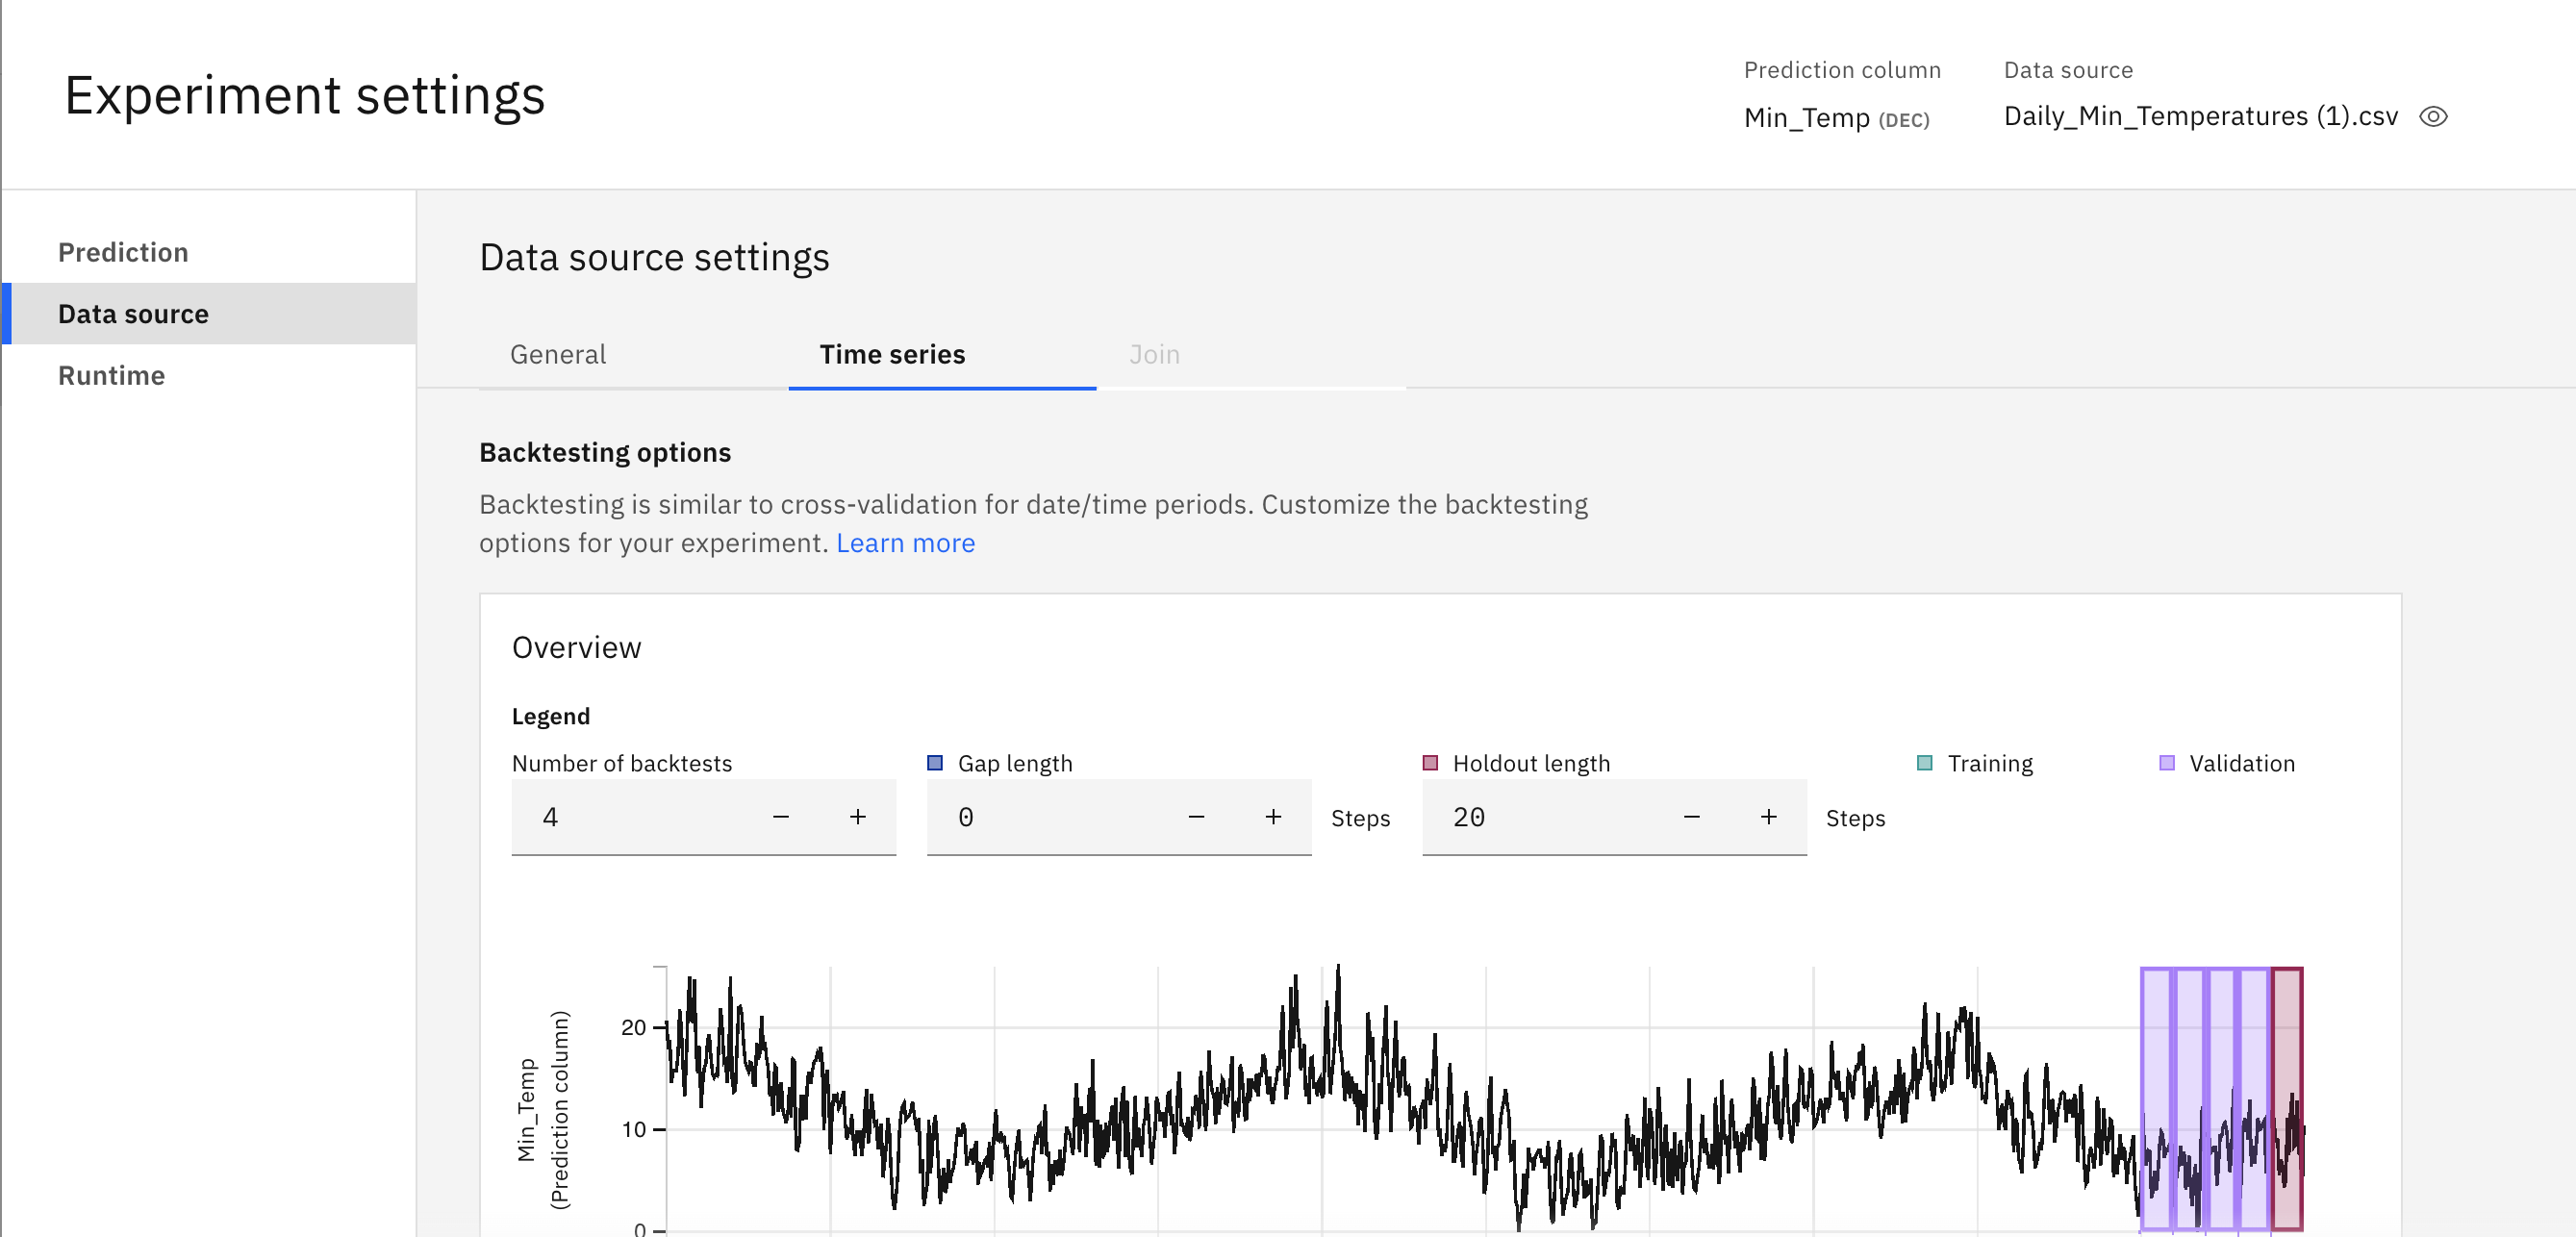
Click Experiment settings to configure the experiment:
-
In the Data source page, select the Time series tab.
-
For this tutorial, accept the default value for Number of backtests (4), Gap length (0 steps), and Holdout length (20 steps).
Note: The validation length changes if you change the value of any of the parameters: *Number of backtests*, *Gap length*, or *Holdout length*.
c. Click Cancel to exit from the Experiment settings.
-
-
Click Run experiment to begin the training.
Review experiment results
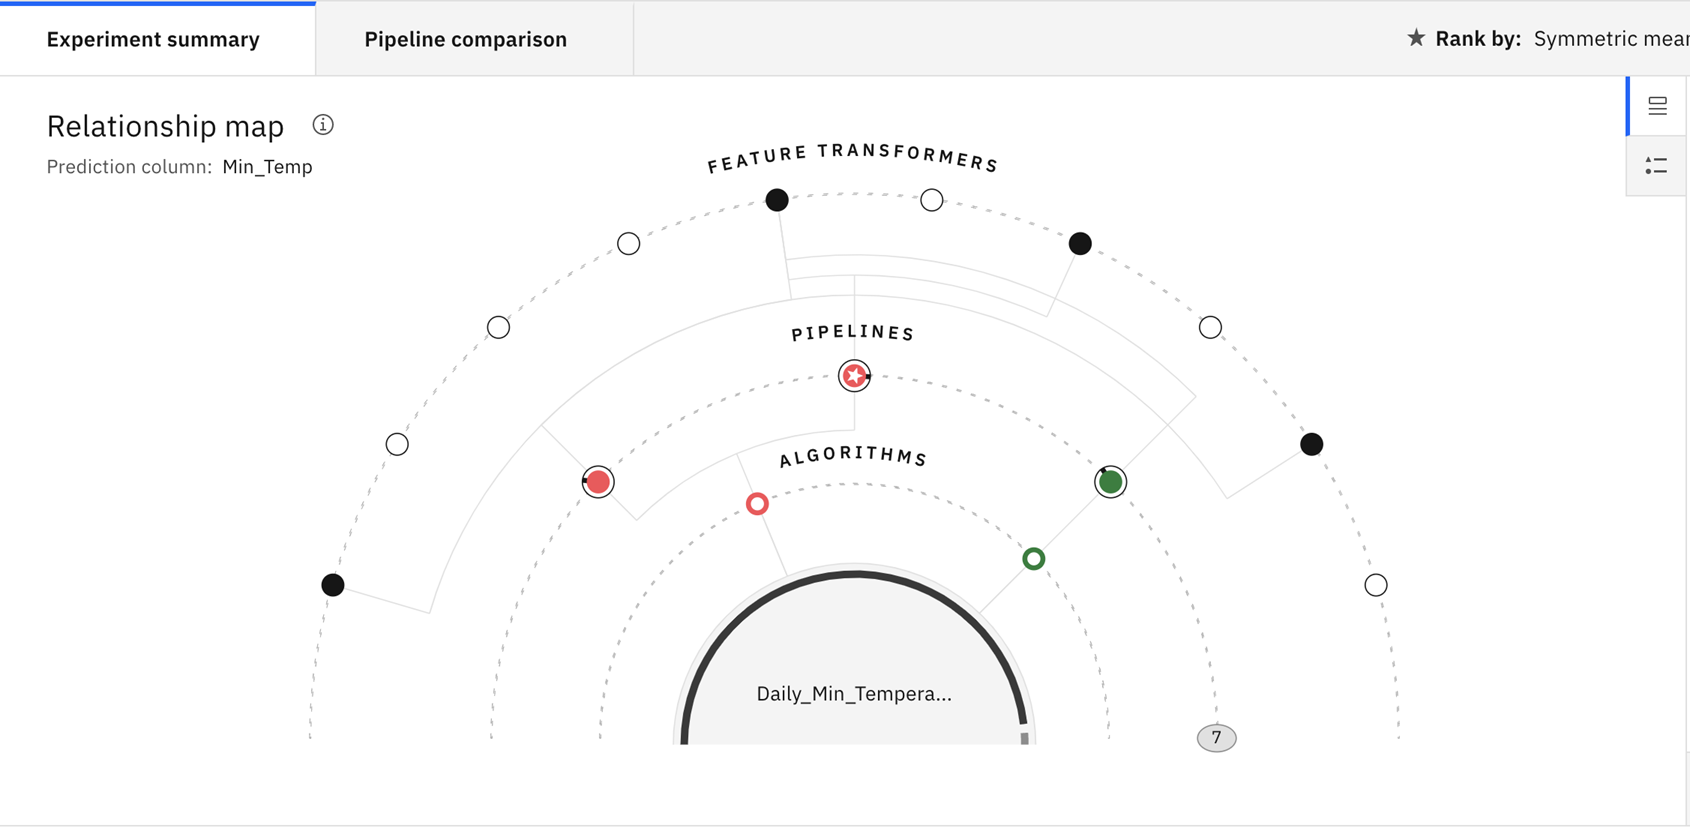
The experiment takes several minutes to complete. As the experiment trains, a visualization shows the transformations that are used to create pipelines. Follow these steps to review experiment results and save the pipeline with the best performance.
-
(Optional): Hover over any node in the visualization to get details on the transformation for a particular pipeline.
-
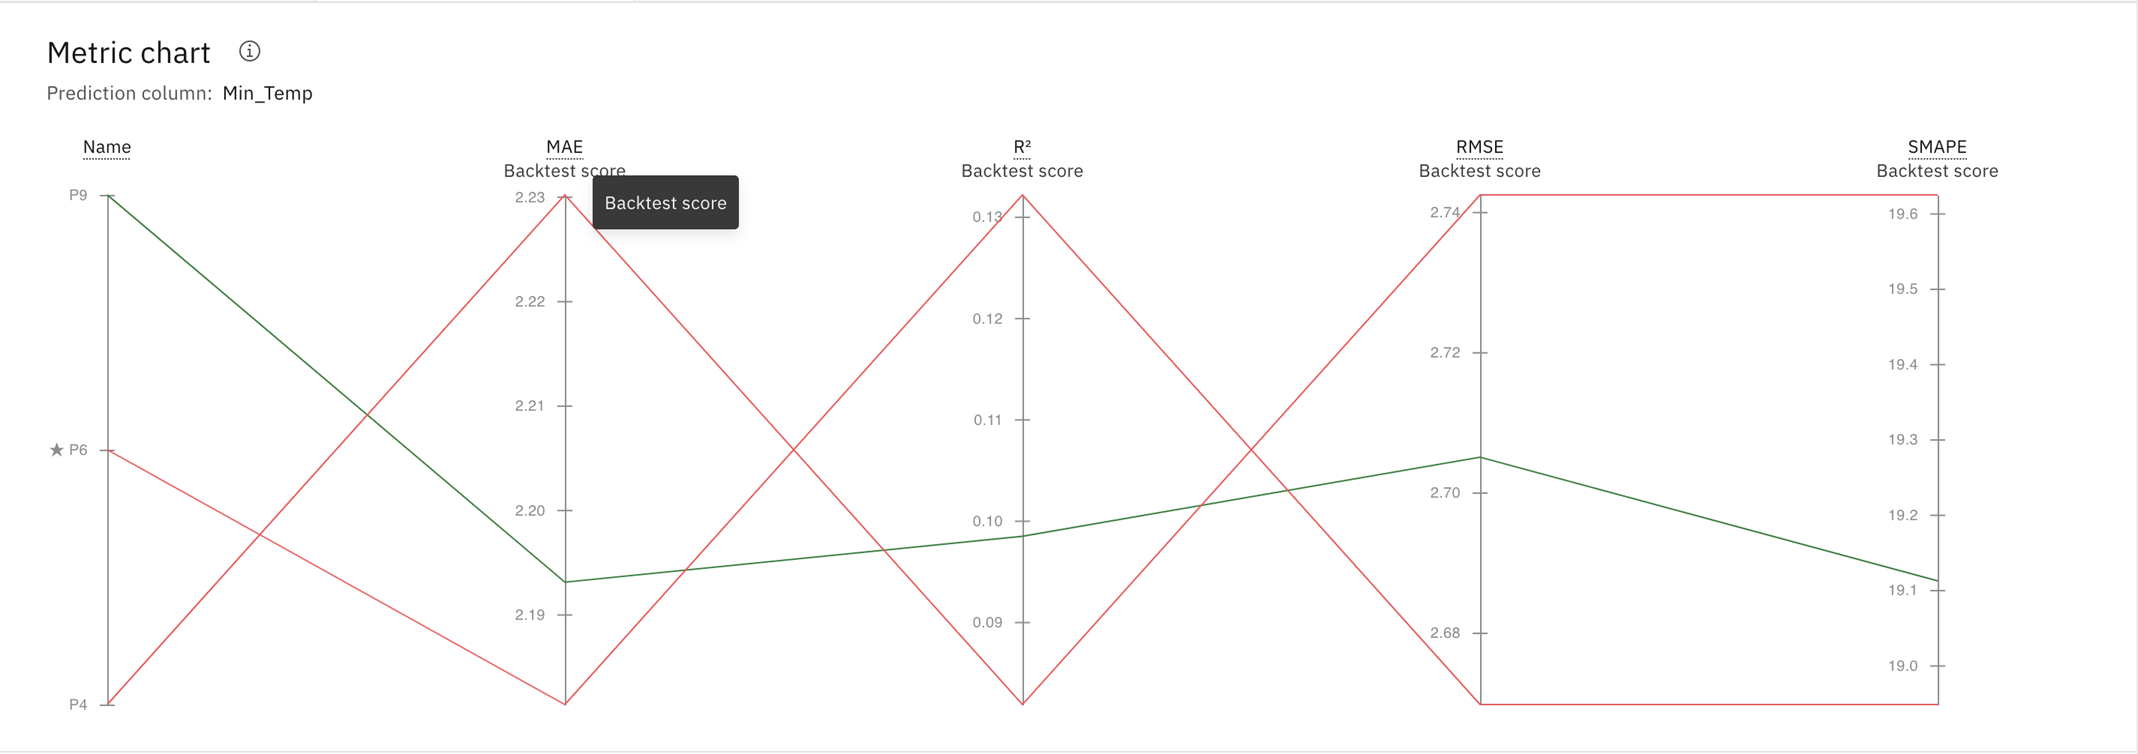
(Optional): After the pipelines are listed on the leaderboard, click Pipeline comparison to see how they differ. For example:
-
(Optional): When the training completes, the top three best performing pipelines are saved to the leaderboard. Click View discarded pipelines to review pipelines with the least performance.

-
Select the pipeline with Rank 1 and click Save as to create your model. Then, select Create. This action saves the pipeline under the Models section in the Assets tab.
Deploy the trained model
Before you can use your trained model to make predictions on new data, you must deploy the model. Follow these steps to promote your trained model to a deployment space:
- You can deploy the model from the model details page. To access the model details page, choose one of the these methods:
- Click the model’s name in the notification that is displayed when you save the model.
- Open the Assets page for the project that contains the model and click the model’s name in the Machine Learning Model section.
- Click Promote to Deployment Space, then select or create a deployment space where the model will be deployed.
(Optional): To create a deployment space, follow these steps:
-
From the Target space list, select Create a new deployment space.
-
Enter a name for your deployment space.
-
To associate a machine learning instance, go to Select machine learning service (optional) and select an instance from the list.
-
Click Create.
-
- After you select or create your space, click Promote.
- Click the deployment space link from the notification.
- From the Assets tab of the deployment space:
- Hover over the model’s name and click the deployment icon
 .
. - In the page that opens, complete the fields:
- Specify a name for the deployment.
- Select Online as the Deployment type.
- Click Create.
- Hover over the model’s name and click the deployment icon
After the deployment is complete, click the Deployments tab and select the deployment name to view the details page.
Test the deployed model
Follow these steps to test the deployed model from the deployment details page:
-
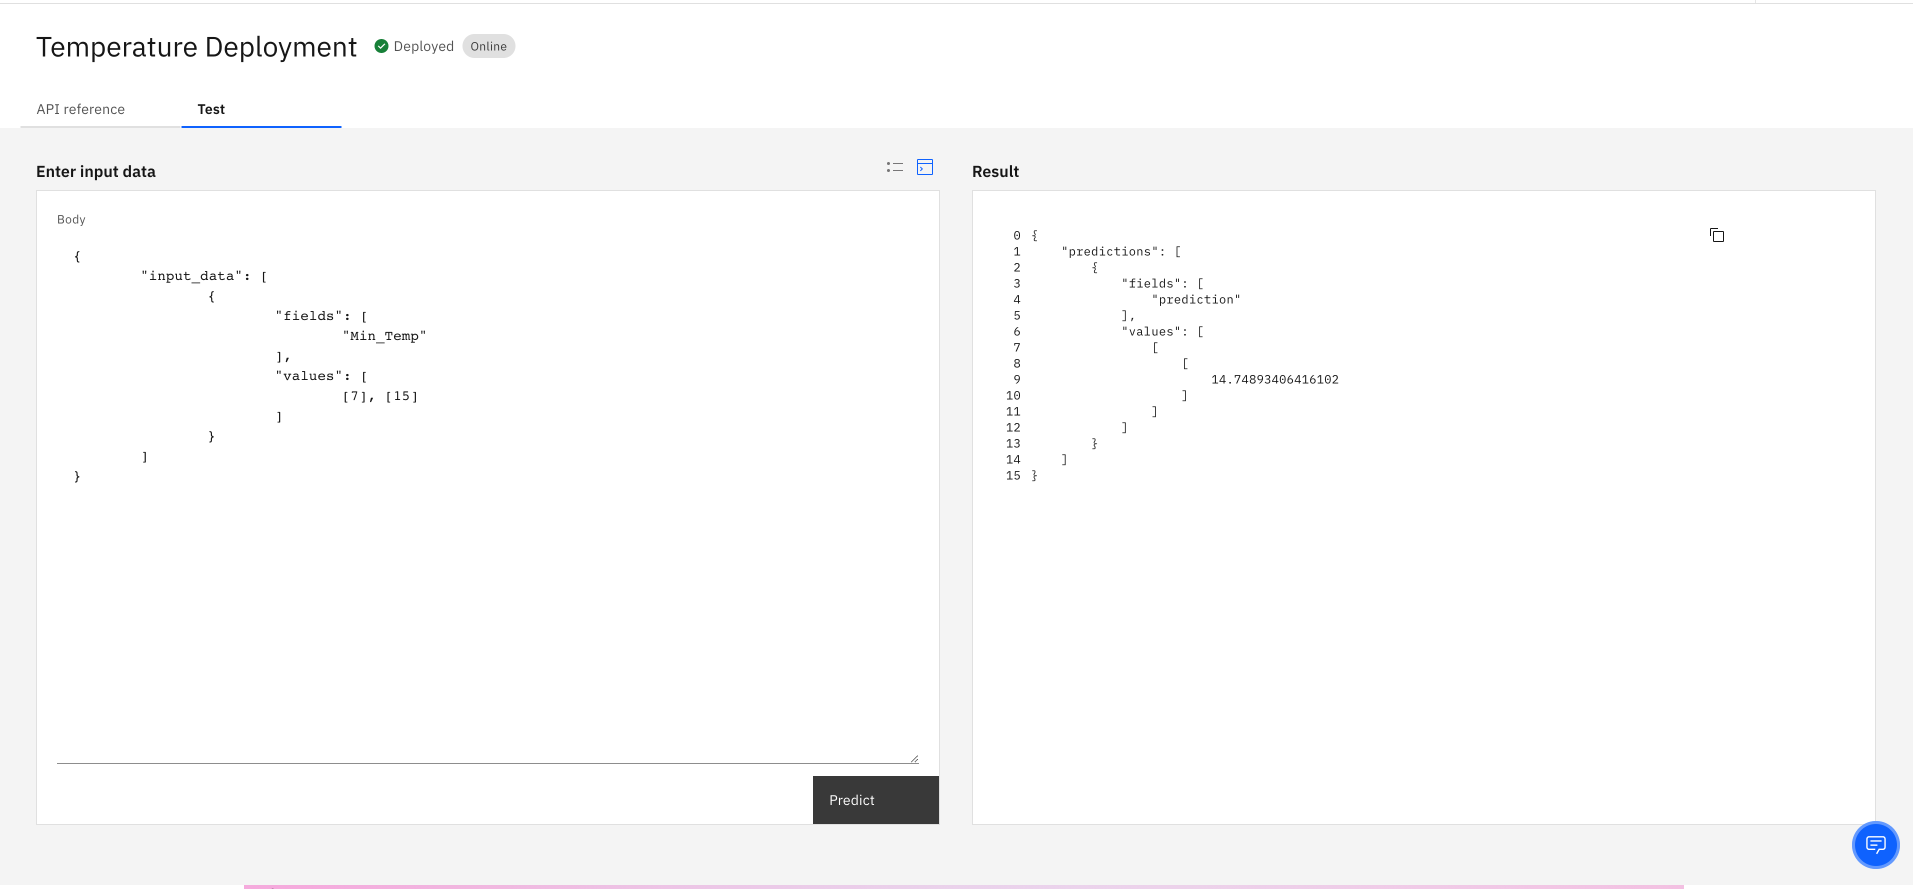
On the Test tab of the deployment details page, click the terminal icon
 and enter the following JSON test data:
{ "input_data": [ {

      "fields": [

            "Min_Temp"

      ],

      "values": [

            [7], [15]

      ]

} ] }
Note: The test data replicates the data fields for the model, except the prediction field. -
Click Predict to predict the future minimum temperature.
Parent topic: Building a time series experiment