Introduction
This notebook demonstrates the use of visual analytics tools that help you measure and understand user journeys within the dialog logic of your Watson Assistant system, discover where user abandonments take place, and reason about possible sources of issues. The visual interface can also help to better understand how users interact with different elements of the dialog flow, and gain more confidence in making changes to it. The source of information is your Watson Assistant skill definitions and conversation logs.
As described in Watson Assistant Continuous Improvement Best Practices, you can use this notebook to measure and understand in detail the behavior of users in areas that are not performing well, e.g. having low Task Completion Rates.
Task Completion Rate - is the percentage of user journeys within key tasks/flows of your virtual assistant that reach a successful resolution. This metric is one of the metrics you can use to measure the Effectiveness of your assistant.
Prerequisites
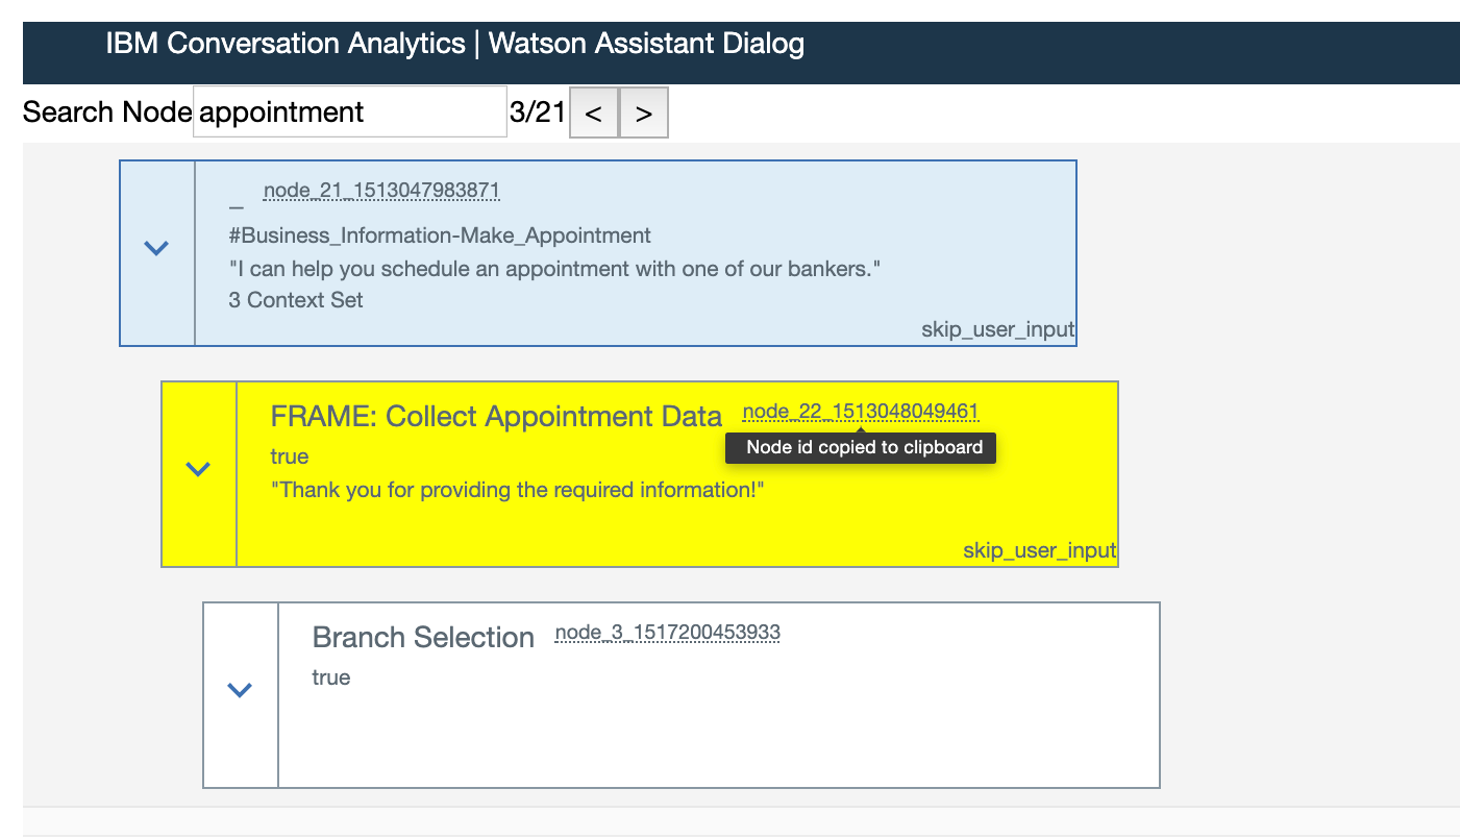
This notebook assumes some familiarity with the Watson Assistant dialog programming model, such as skills (formerly workspaces), and dialog nodes. Some familiarity with Python is recommended. This notebook runs on Python.
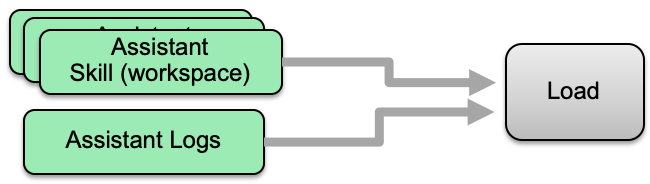 The analytics in this notebook are based on two main artifacts:
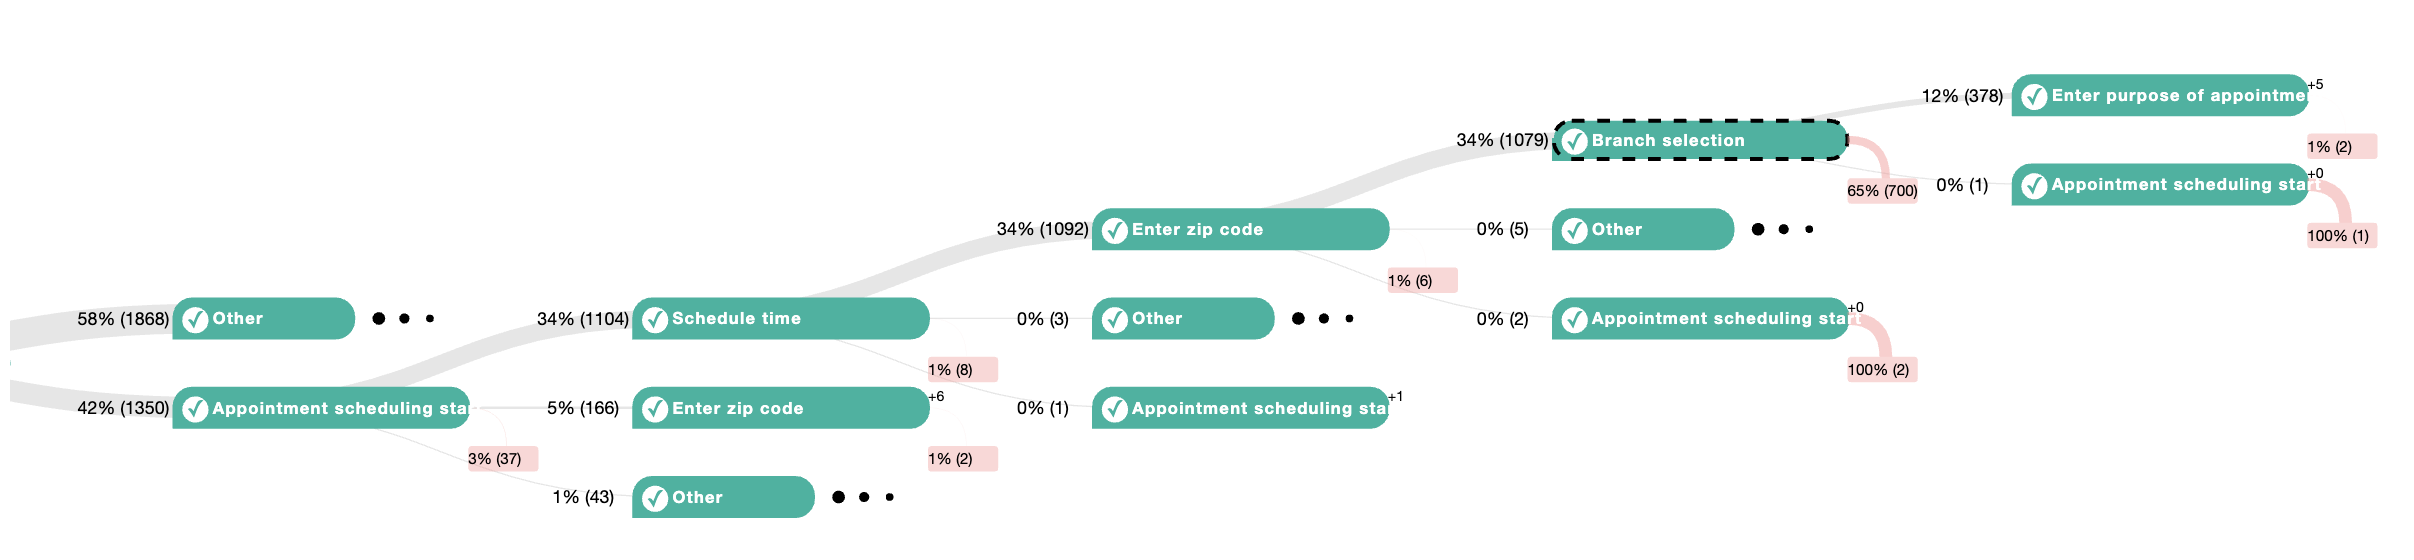
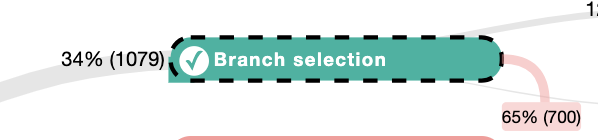 Selecting nodes in the visualization enables you to explore and analyze abandoned conversations with a common conversation path. You can use the visualization to identify large volumes of conversations that users abandon at unexpected locations during the conversation.
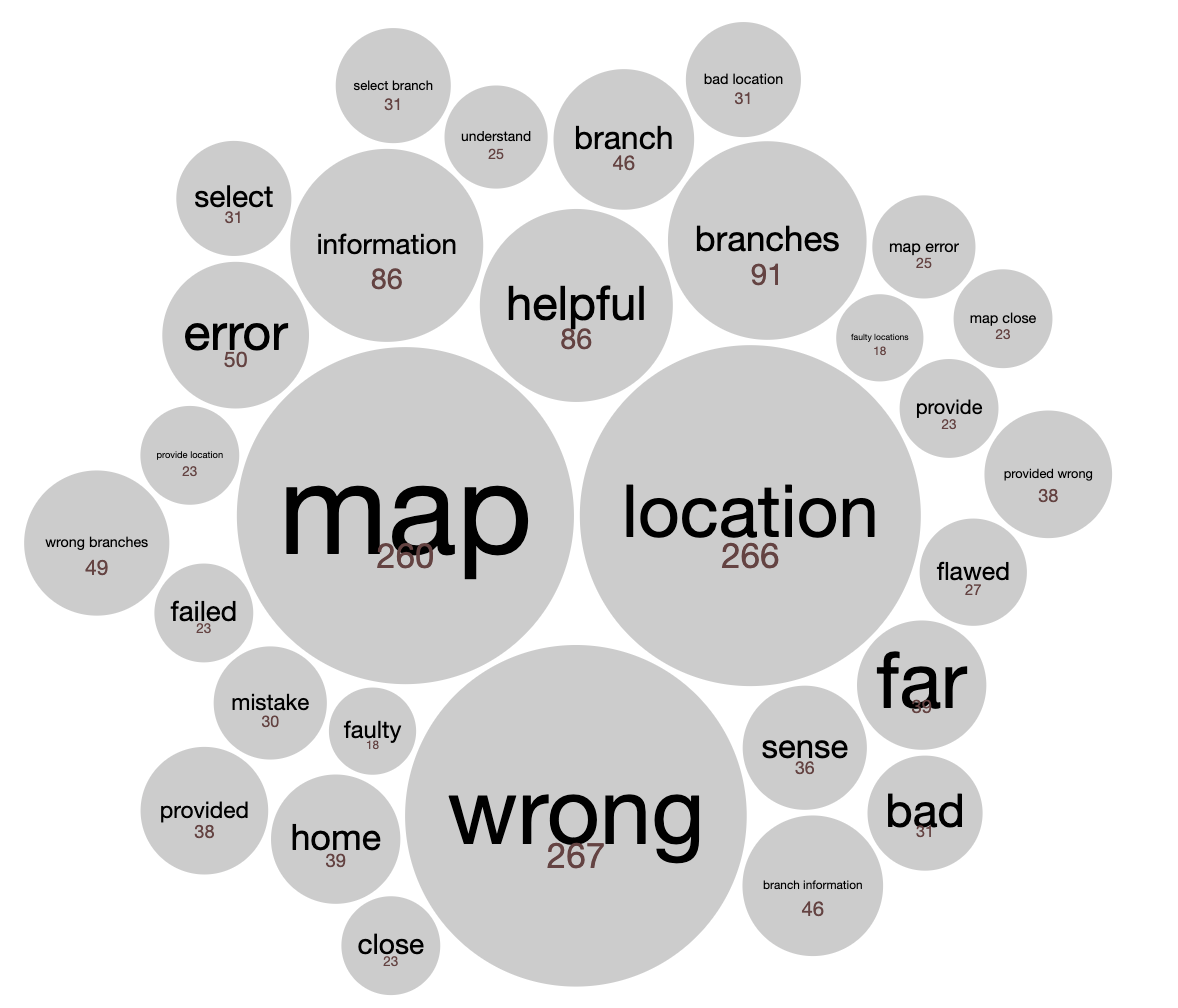 The keywords and phrases analysis allows you to check if the phrase `wrong map` is prevalent in many of the abandoned conversations, or what are the most common words or phrases overall.
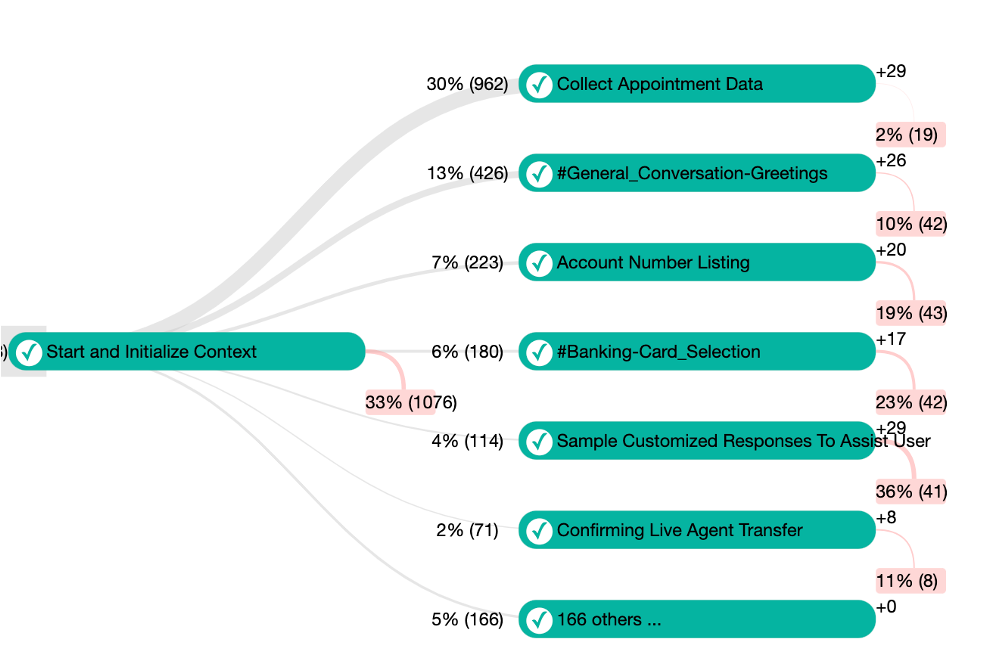
 In some scenarios you might want to first measure the effectiveness of your assistant at key areas within the skill, before drilling into specific flows. Measuring the volume and effectiveness of specific key areas, can help you detect trends around your release dates, as well as prioritize your improvement efforts.