About cookies on this site Our websites require some cookies to function properly (required). In addition, other cookies may be used with your consent to analyze site usage, improve the user experience and for advertising. For more information, please review your options. By visiting our website, you agree to our processing of information as described in IBM’sprivacy statement. To provide a smooth navigation, your cookie preferences will be shared across the IBM web domains listed here.
Last updated: Nov 27, 2024
A bucket is a logical abstraction that provides a container for data. Buckets in Cloud Object Storage are created in IBM Cloud. Within a Cloud Object Storage instance, you can use policies to restrict users' access to buckets.
Here's how it works:

In this illustration, two credentials are associated with a Cloud Object Storage instance. Each of the credentials references an IAM service ID in which policies are defined to control which bucket that service ID can access. By using a specific credential when you add a Cloud Object Storage connection to a project, only the buckets accessible to the service ID associated with that credential are visible.
To create connections that restrict users' access to buckets, follow these steps.
First, in IBM Cloud:
-
Edit the policies of each service ID to provide access to the appropriate buckets
-
Copy values from each of the service credentials that you created
-
Then, in your project:
-
Add Cloud Object Storage connections that use the service credentials that you created
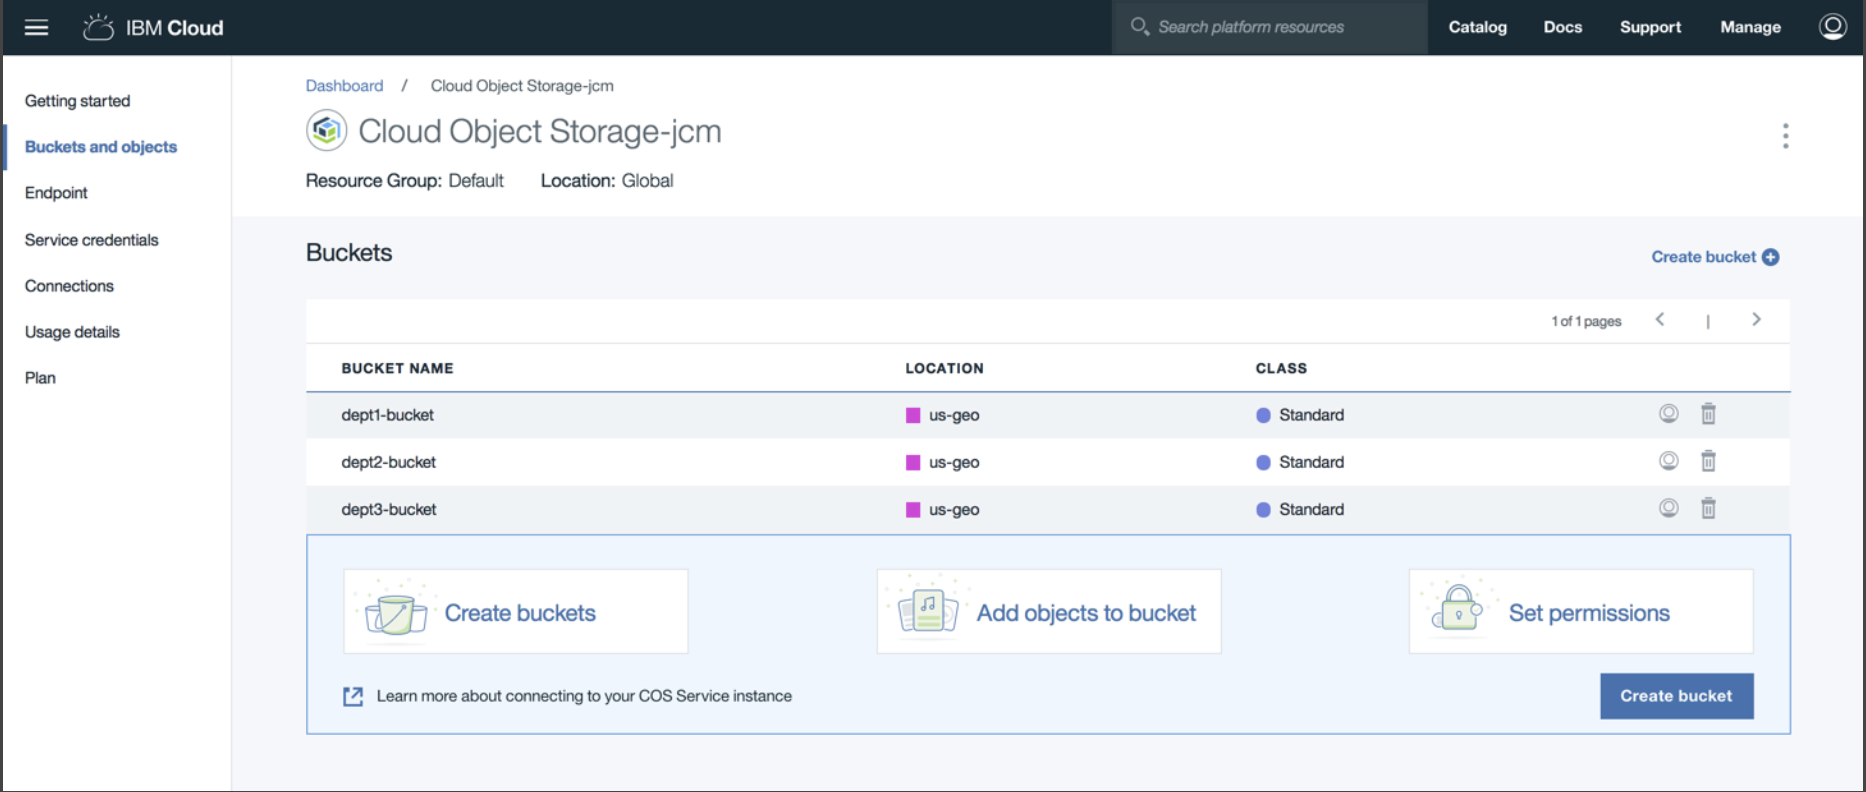
Step 1: Create a Cloud Object Storage instance and several buckets
-
From the IBM Cloud catalog, search for Object Storage, then create a Cloud Object Storage instance.
-
Select Buckets in the navigation pane.
-
Create as many buckets as you need.
For example, create three buckets: dept1-bucket, dept2-bucket, and dept3-bucket.
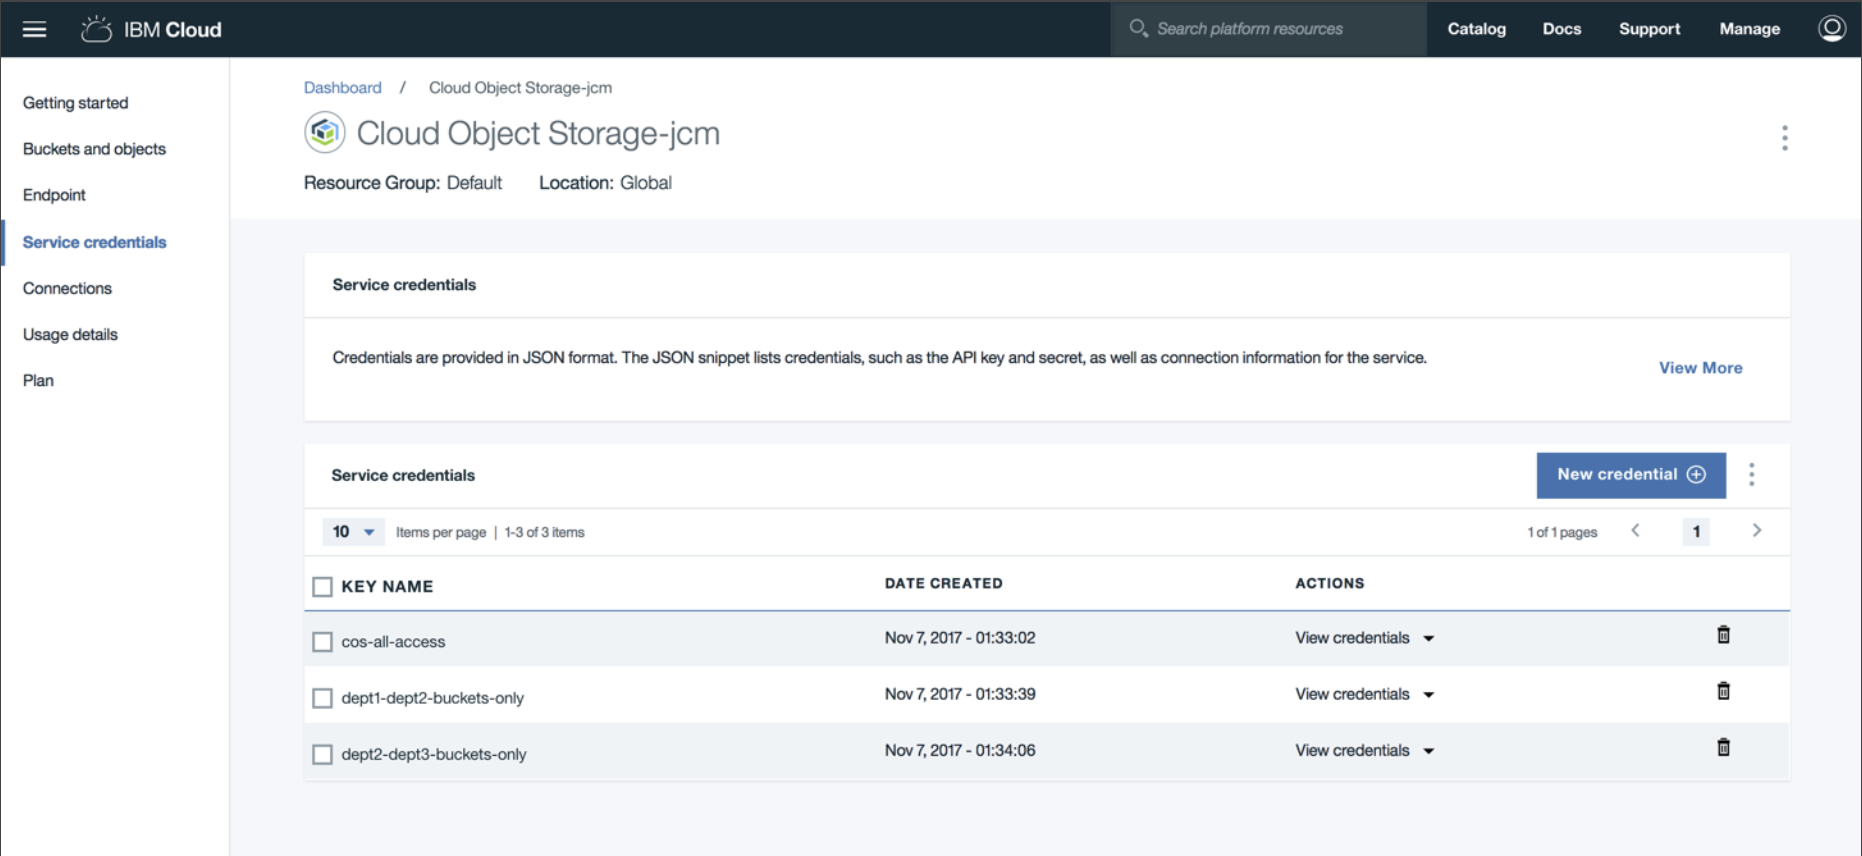
Step 2: Create a service credential and Service ID for each combination of buckets that you want users to be able to access
-
Select Service credentials in the navigation pane.
-
Click New Credential.
-
In the Add new credential dialog, provide a name for the credential and select the appropriate access role.
-
Within the Select Service ID field, click Create New Service ID.
-
Enter a name for the new service ID. We recommend using the same or a similar name to that of the credential for easy identification.
-
Click Add.
-
Repeat steps 2 to 6 for each credential that you want to create.
For example, create three credentials: cos-all-access, dept1-dept2-buckets-only, and dept2-dept3-buckets-only.
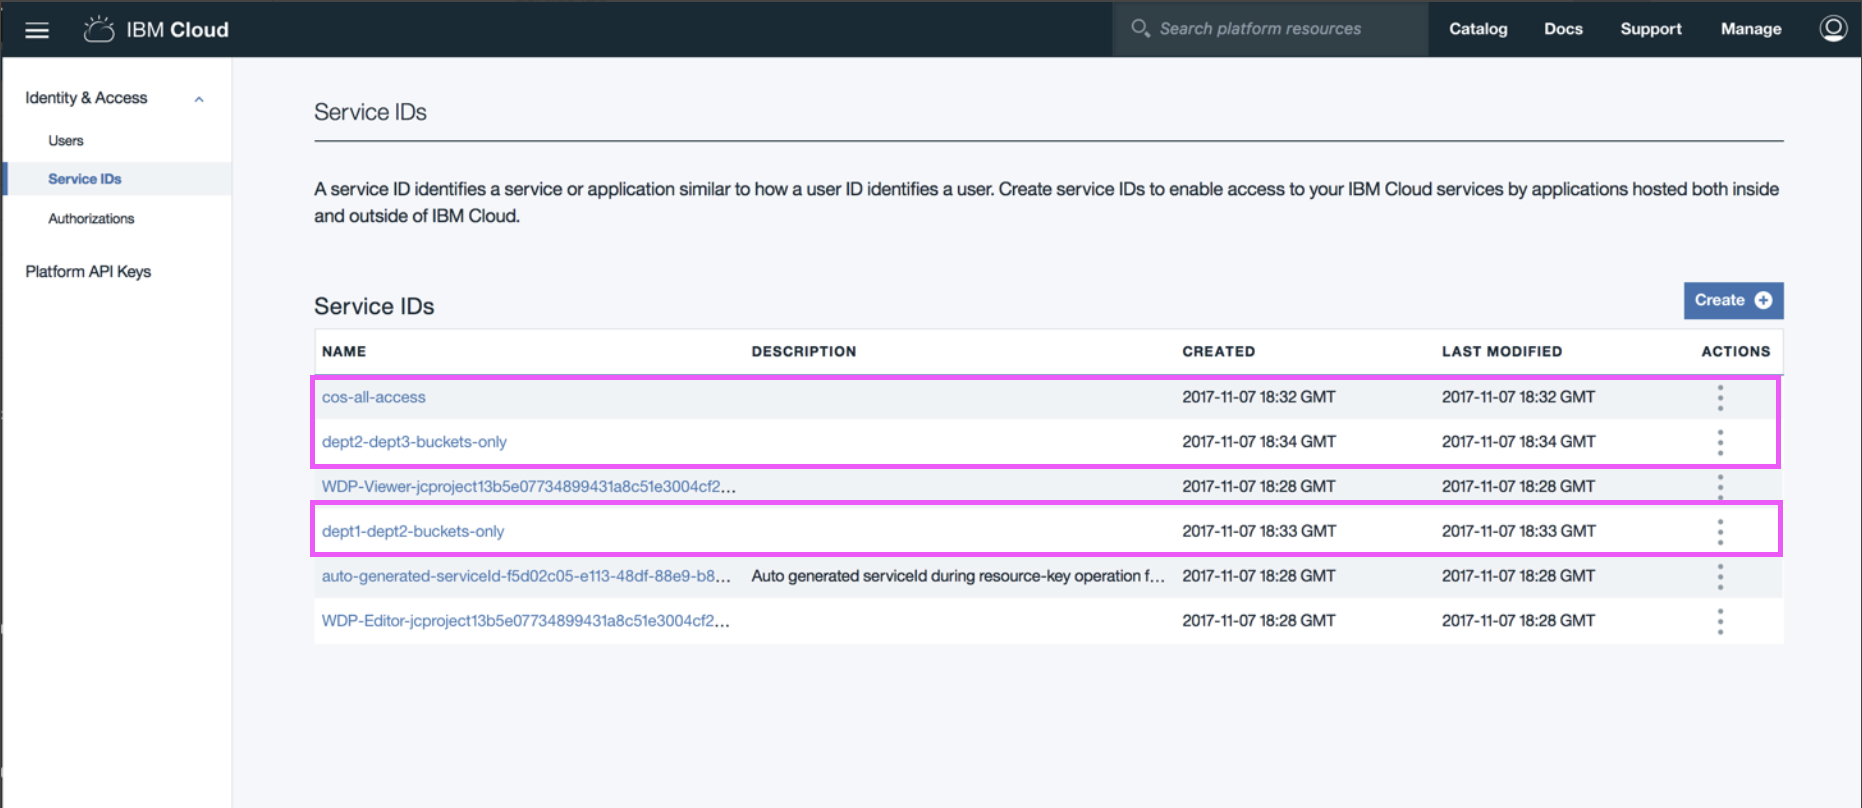
Step 3: Verify that the service IDs were created
-
In the IBM Cloud page header, click Manage > Access (IAM).
-
Select Service IDs in the navigation pane.
-
Confirm that the service IDs you created in steps 2d and 2e are visible.
Step 4: Edit the policies of each service ID to provide access to the appropriate buckets
-
Open each service ID in turn.
-
On the Access policies tab, select Edit from the Actions menu to view the policy.
-
If necessary, edit the policy to provide access to the appropriate buckets.
-
If needed, create one or more new policies.
-
Remove the existing, default policy which provides access to all of the buckets in the Cloud Object Storage instance.
-
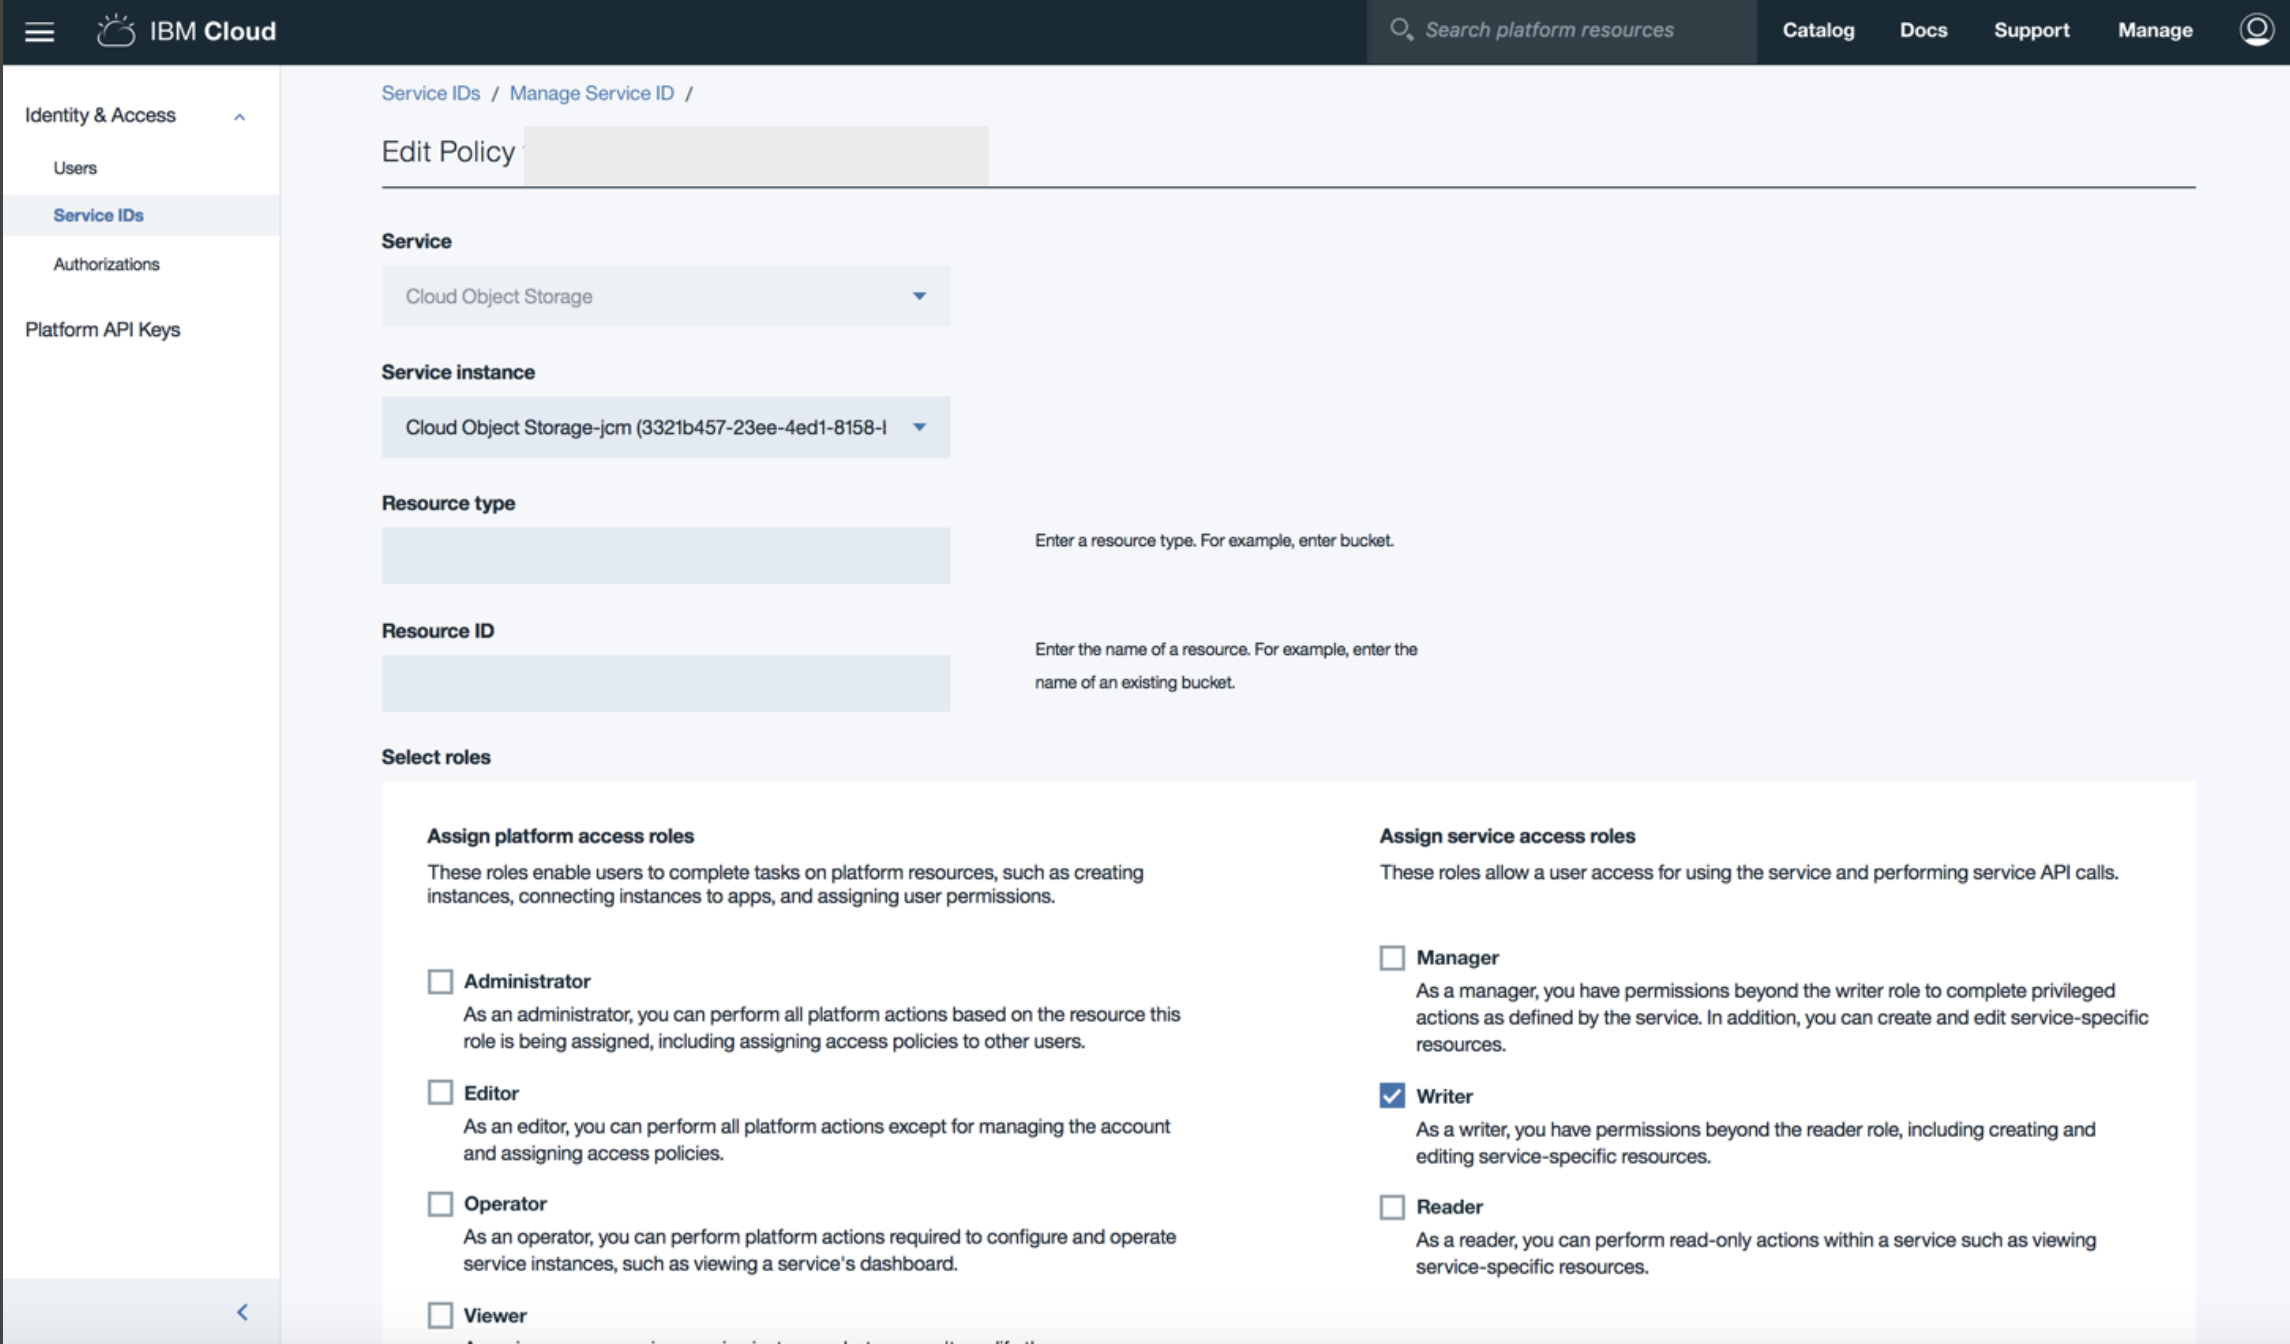
Click Assign access.
-
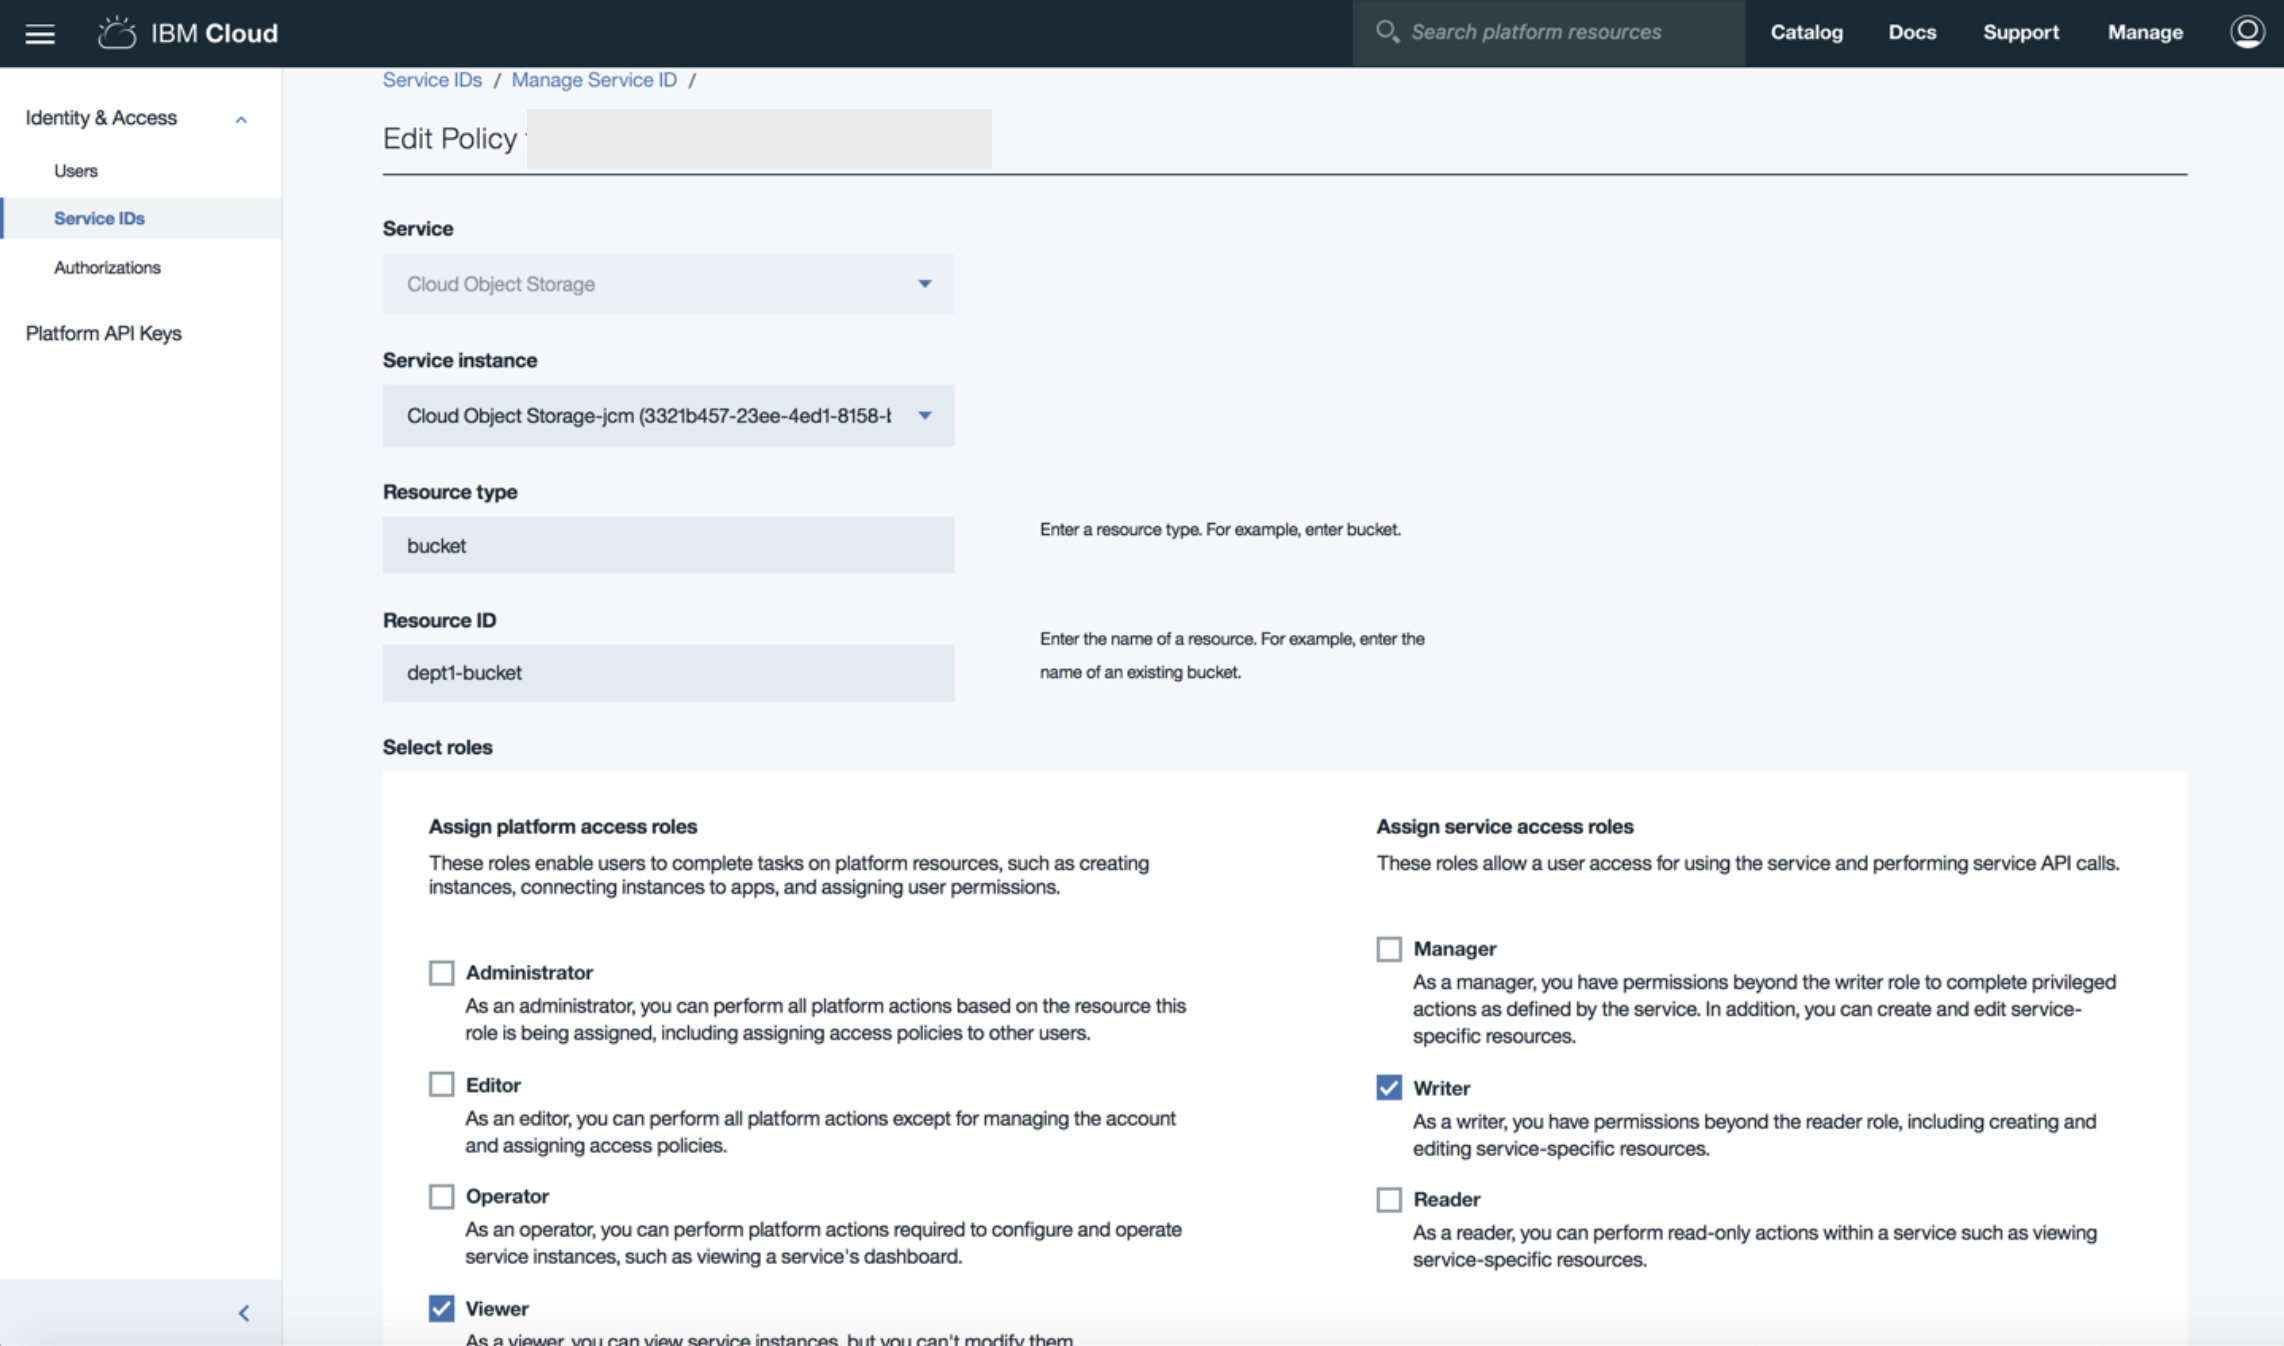
For Resource type, specify "bucket".
-
For Resource ID, specify a bucket name.
-
In the Select roles section, select Viewer from the "Assign platform access roles" list and select Writer from the "Assign service access roles" list.
-
Example 1
By default, the policy for the cos-all-access service ID provides Writer access to the Cloud Object Storage instance.
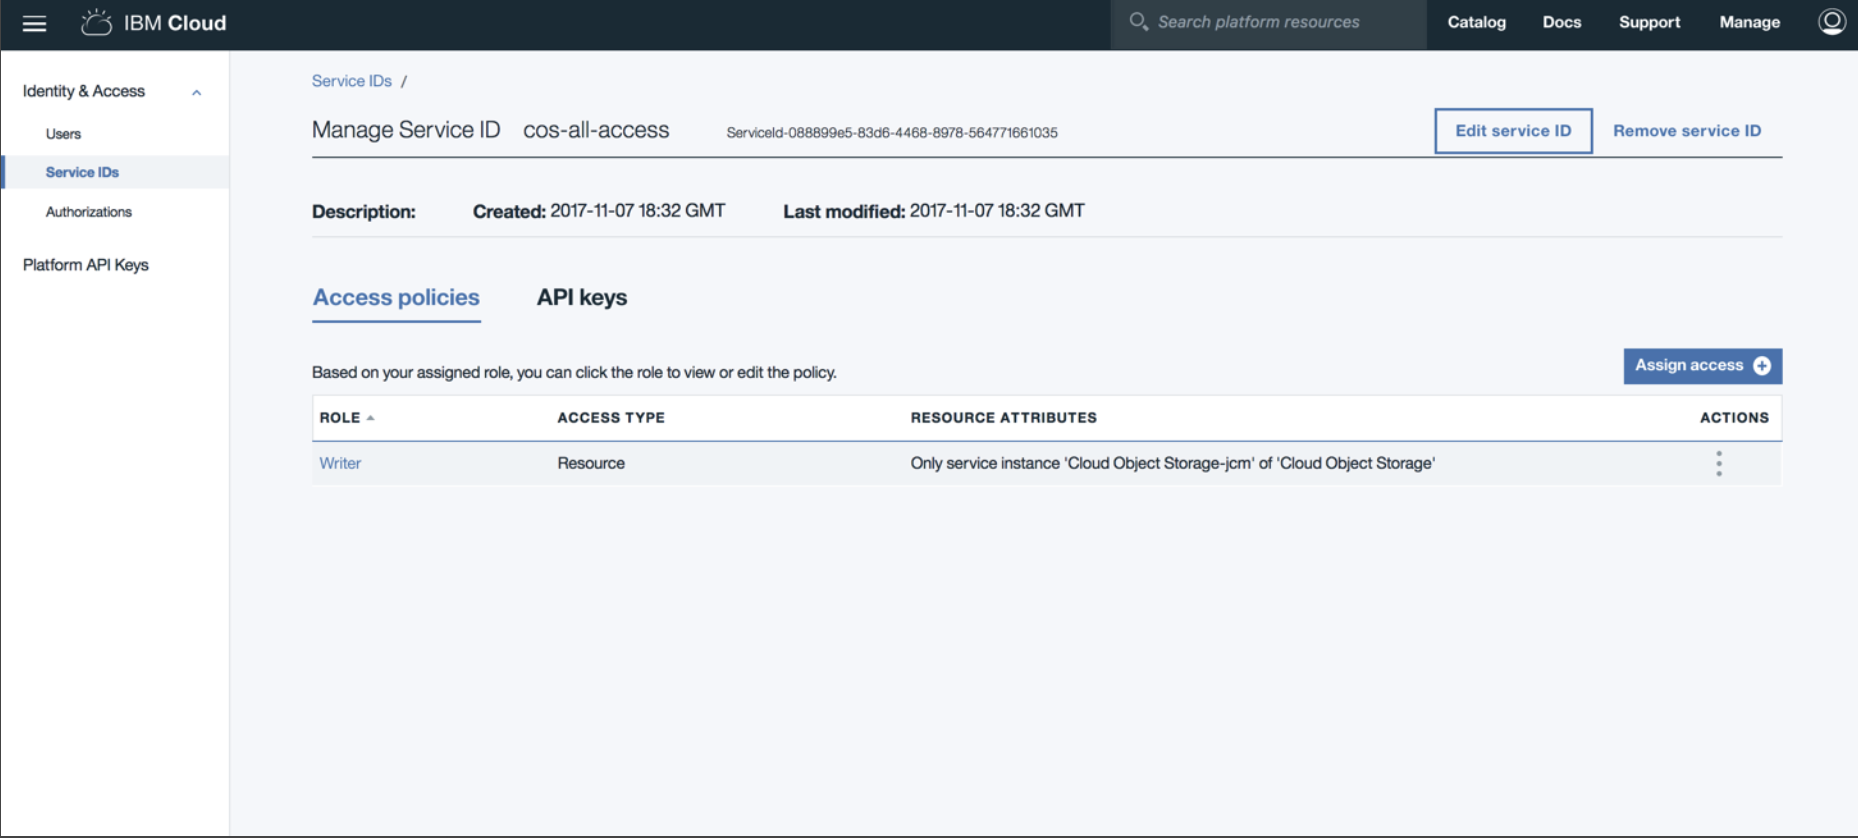
Because you want this service ID and the corresponding credential to provide users with access to all of the buckets, no edits are required.
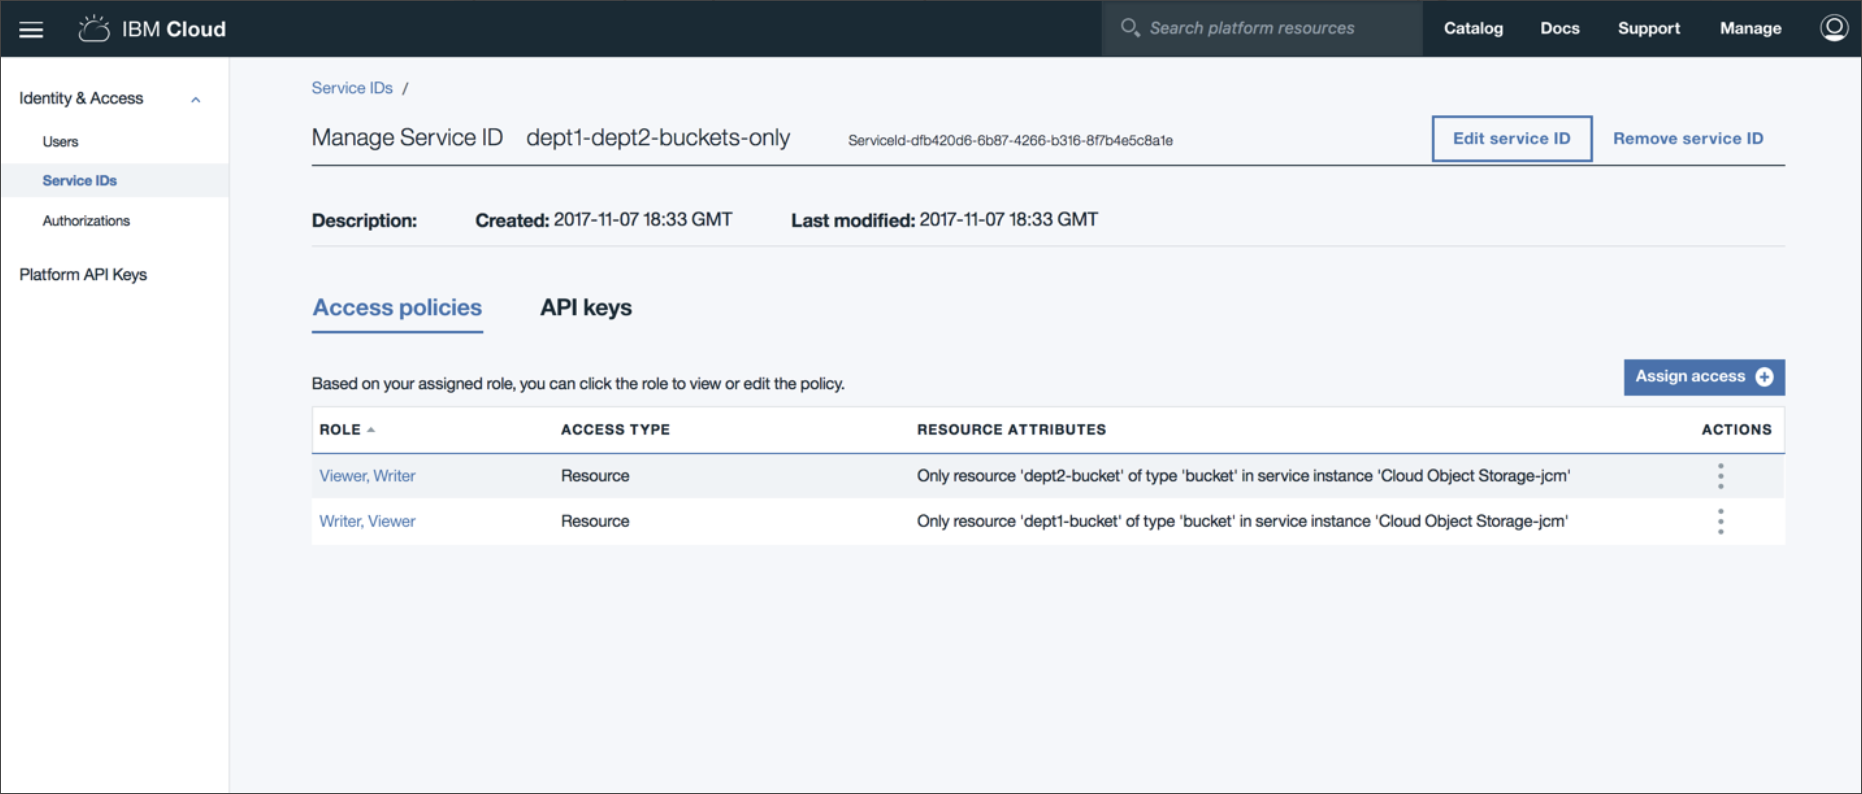
Example 2
By default, the policy for the "dept1-dept2-buckets-only" service ID provides Writer access to the Cloud Object Storage instance. Because you want this service ID and the corresponding credential to provide users with access only
to the dept1-bucket and dept2-bucket buckets, remove the default policy and create two access policies, one for dept1-bucket and one for dept2-bucket.

Step 5: Copy values from each of the service credentials that you created
-
Return to your IBM Cloud Dashboard and select Cloud Object Storage from the Storage list.
-
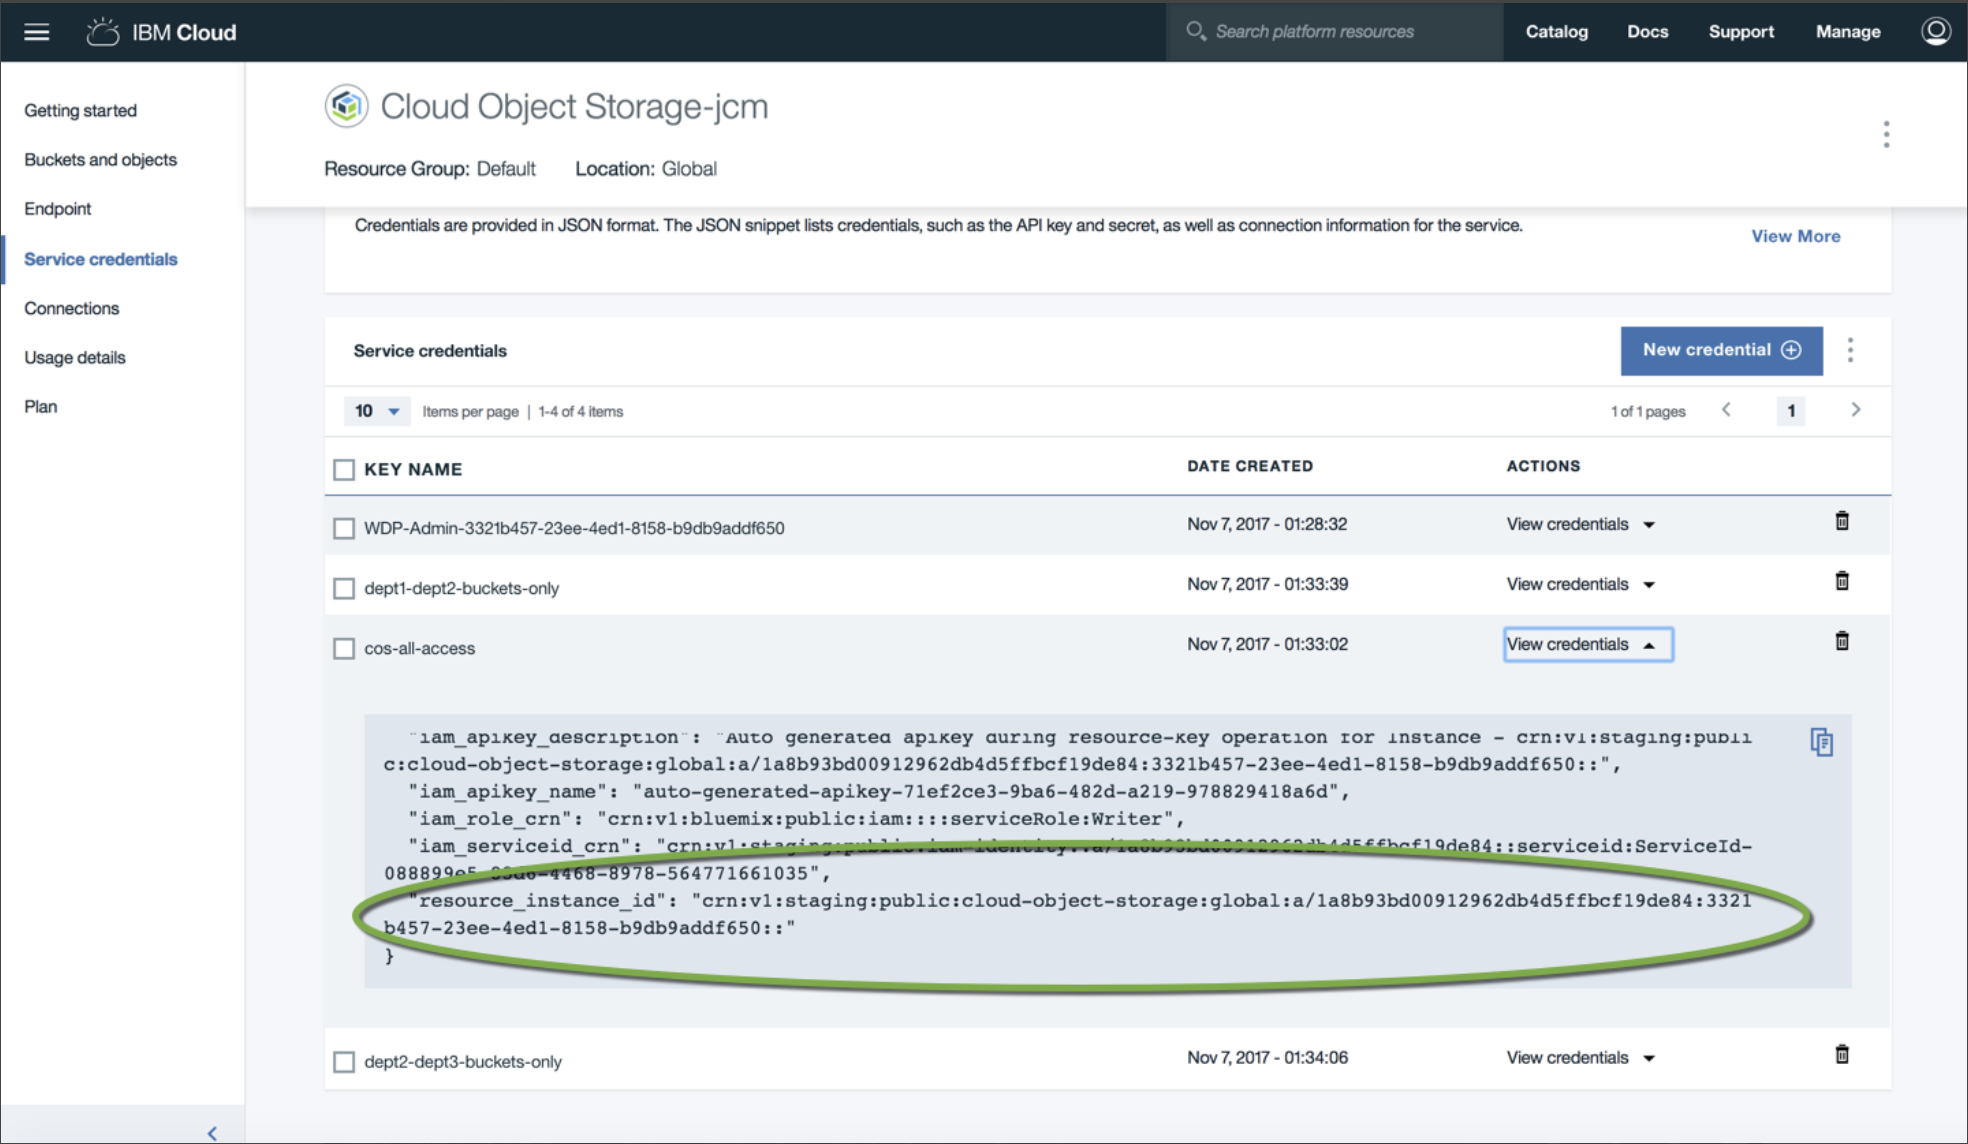
Select Service credentials in the navigation pane.
-
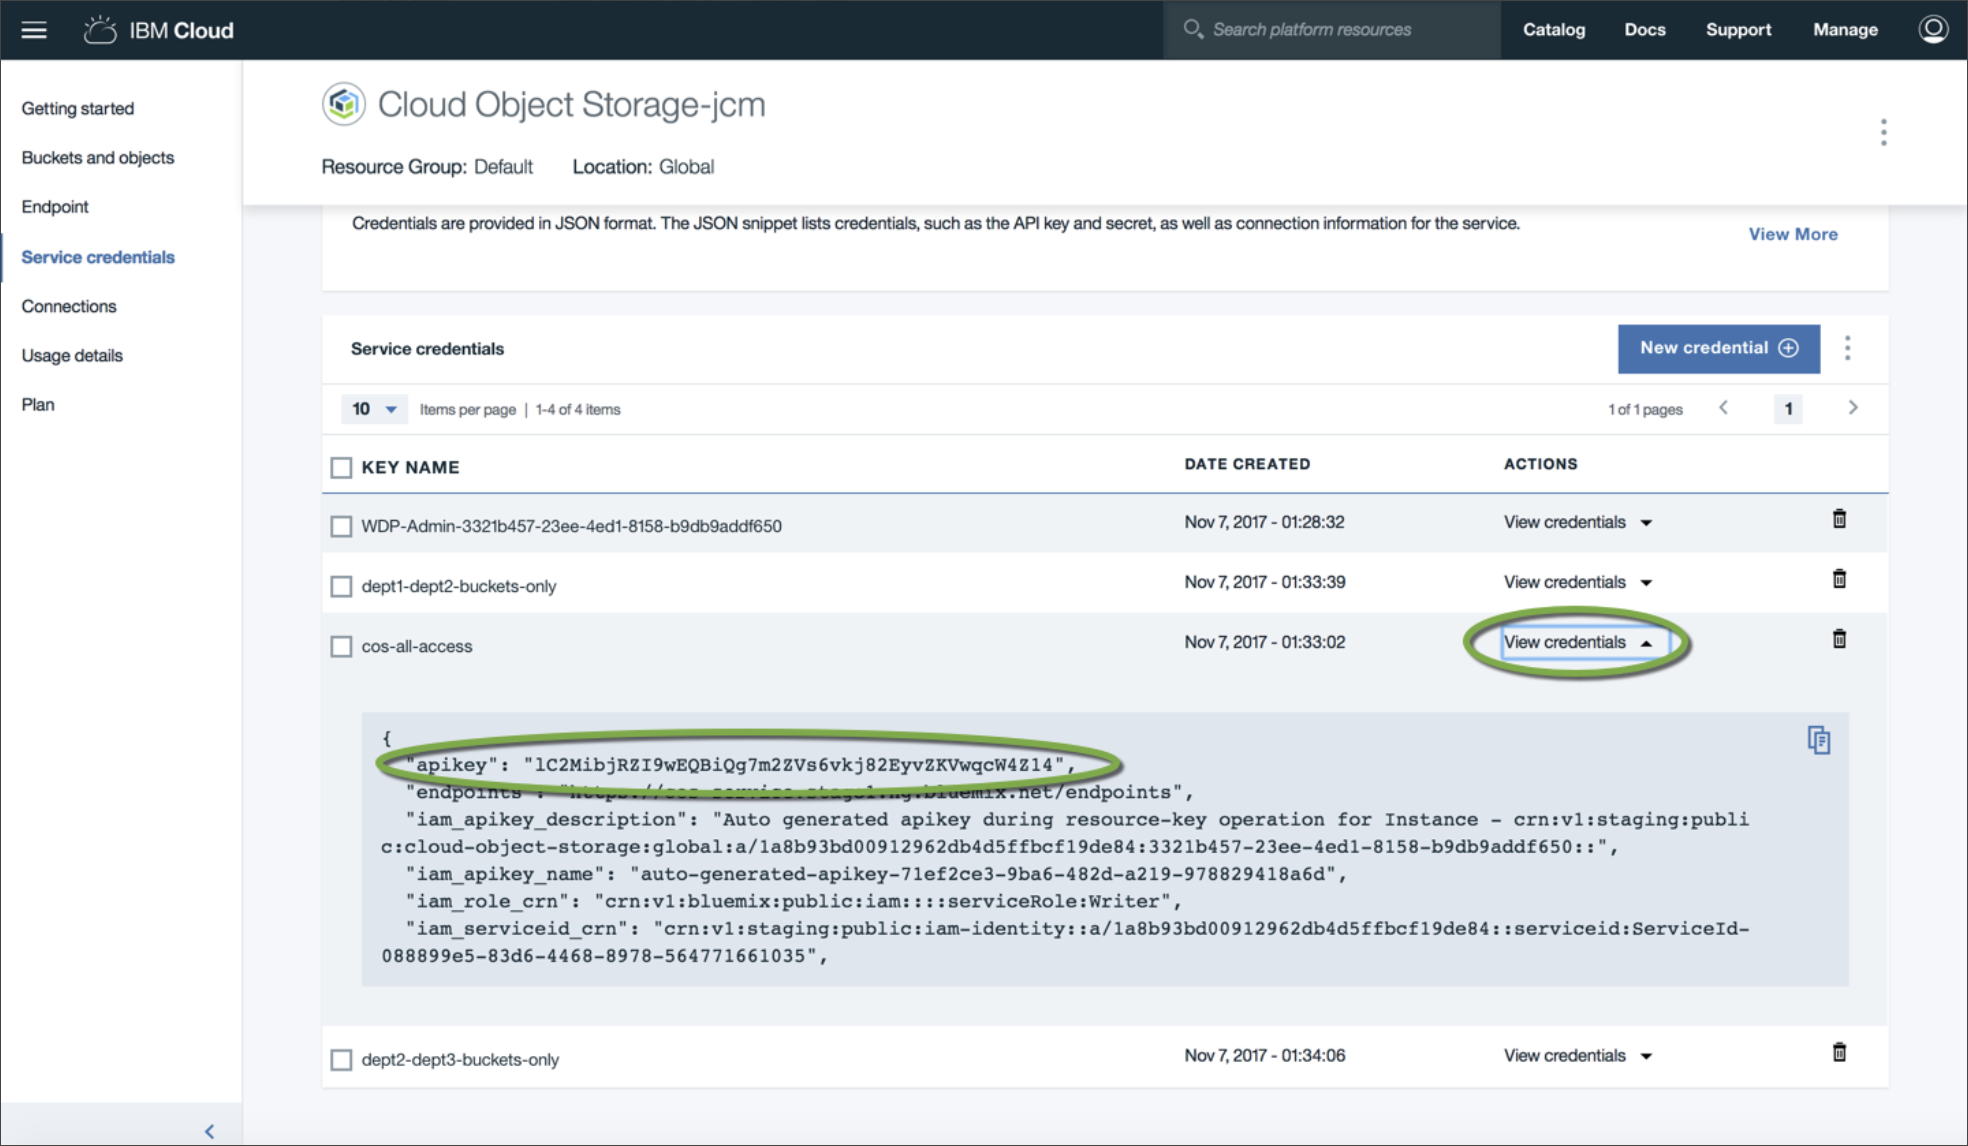
Click the View credentials action for one of the service IDs that you created in step 2.
-
Copy the "apikey" value and the "resource_instance_id" value to a temporary location, such as a desktop note.
-
Repeat steps 3 and 4 for each credential.
Step 6: Copy the Endpoint
-
Select Endpoint in the navigation pane.
-
Copy the URL of the endpoint that you want to connect to. Save the value to a temporary location, such as a desktop note.
Step 7: Add Cloud Object Storage connections that use the service credentials that you created
-
Return to your project on the Assets tab, and click New asset > Connect to a data source..
-
On the New connection page, click Cloud Object Storage.
-
Name the new connection and enter the login URL (from the Endpoints page) as well as the "apikey" and "resource_instance_id" values that you copied in step 5 from one of the service credentials.
-
Repeat steps 3 to 5 for each service credential.
The connections will be visible in the Data assets section of the project.
Test users' access to buckets
Going forward, when you add a data asset from a Cloud Object Storage connection to a project, you'll see only the buckets that the policies allow you to access. To test this:
-
From a project, click Import assets > Connected data. Or from a catalog, click Add to catalog > Connected asset.
-
In the Connection source section, click Select source.
On the Select connection source page, you can see the Cloud Object Storage connections that you created.
-
Select one of the Cloud Object Storage connections to see that only the buckets accessible to the service ID associated with that bucket's credential are visible.
Parent topic: IBM Cloud Object Storage connection