You can easily integrate, cleanse, and analyze data from disparate data sources using a DataStage flow. Read about the DataStage tool, then watch a video and take a tutorial that’s suitable for users with some knowledge of data transformation, but does not require coding.
- Required services
- watsonx.ai Studio
- DataStage
Your basic workflow includes these tasks:
- Create a project. Projects are where you can collaborate with others to work with data.
- Add your data to the project. You can add CSV files or data from a remote data source through a connection.
- Create a DataStage flow.
- Perform steps using operations to refine the data.
- Create and run a job to transform the data.
Read about DataStage
DataStage is an extract, transform, and load (ETL) tool that you can use to transform and integrate data in projects.
DataStage is designed for ease of use and is fully integrated into the platform. You can import your existing legacy parallel jobs into DataStage through the use of ISX files, use the DataStage canvas to create, edit, and test flows, and run jobs that are generated from the flows.
Watch a video about transforming data using a DataStage flow
 Watch this video to see how to create a simple DataStage flow.
This video provides a visual method to learn the concepts and tasks in this documentation.
Try a tutorial to transforming data
In this tutorial, you will complete these tasks:
- Task 1: Open a project.
- Task 2: Add the data set to your project.
- Task 3: Create a DataStage flow.
- Task 4: Edit the nodes.
- Task 5: Run your DataStage flow and view your asset.
This tutorial will take approximately 20 minutes to complete.
Tips for completing this tutorial
Here are some tips for successfully completing this tutorial.
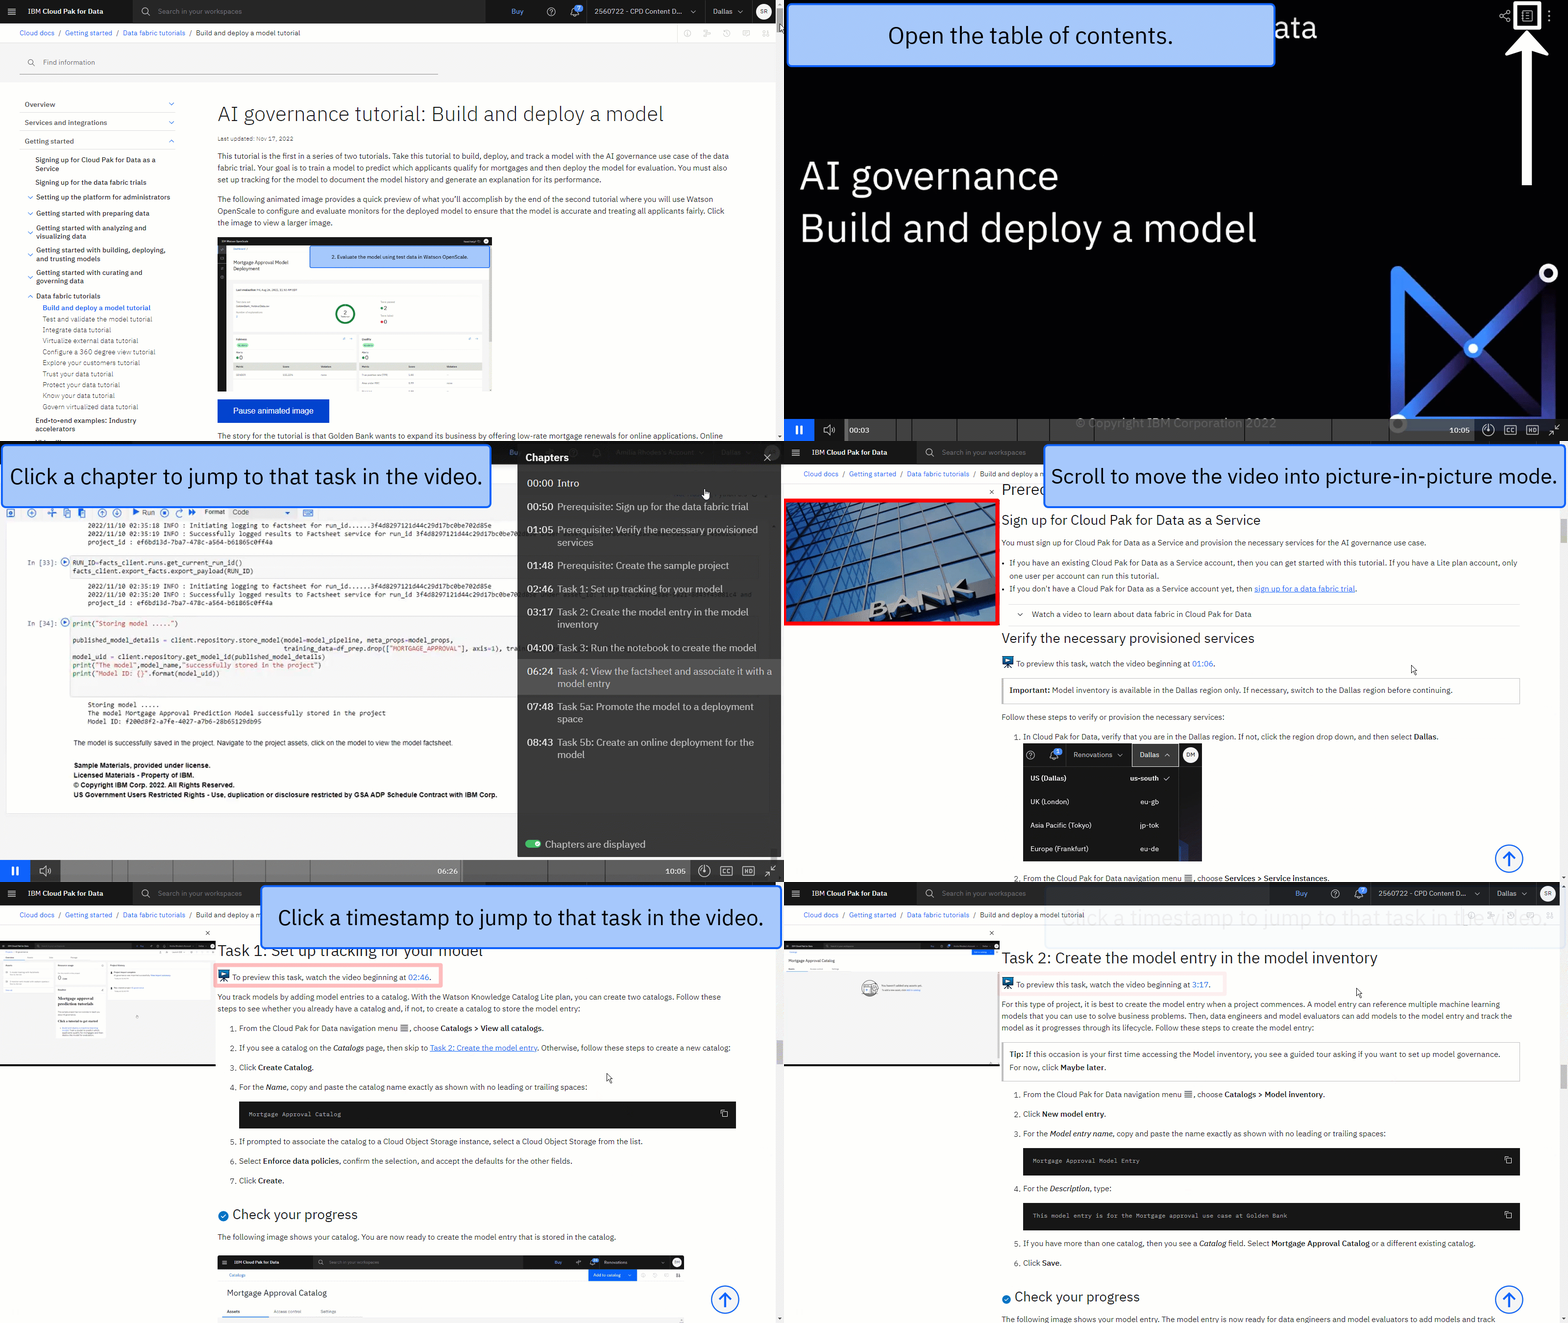
Use the video picture-in-picture
The following animated image shows how to use the video picture-in-picture and table of contents features:

Get help in the community
If you need help with this tutorial, you can ask a question or find an answer in the Cloud Pak for Data Community discussion forum.
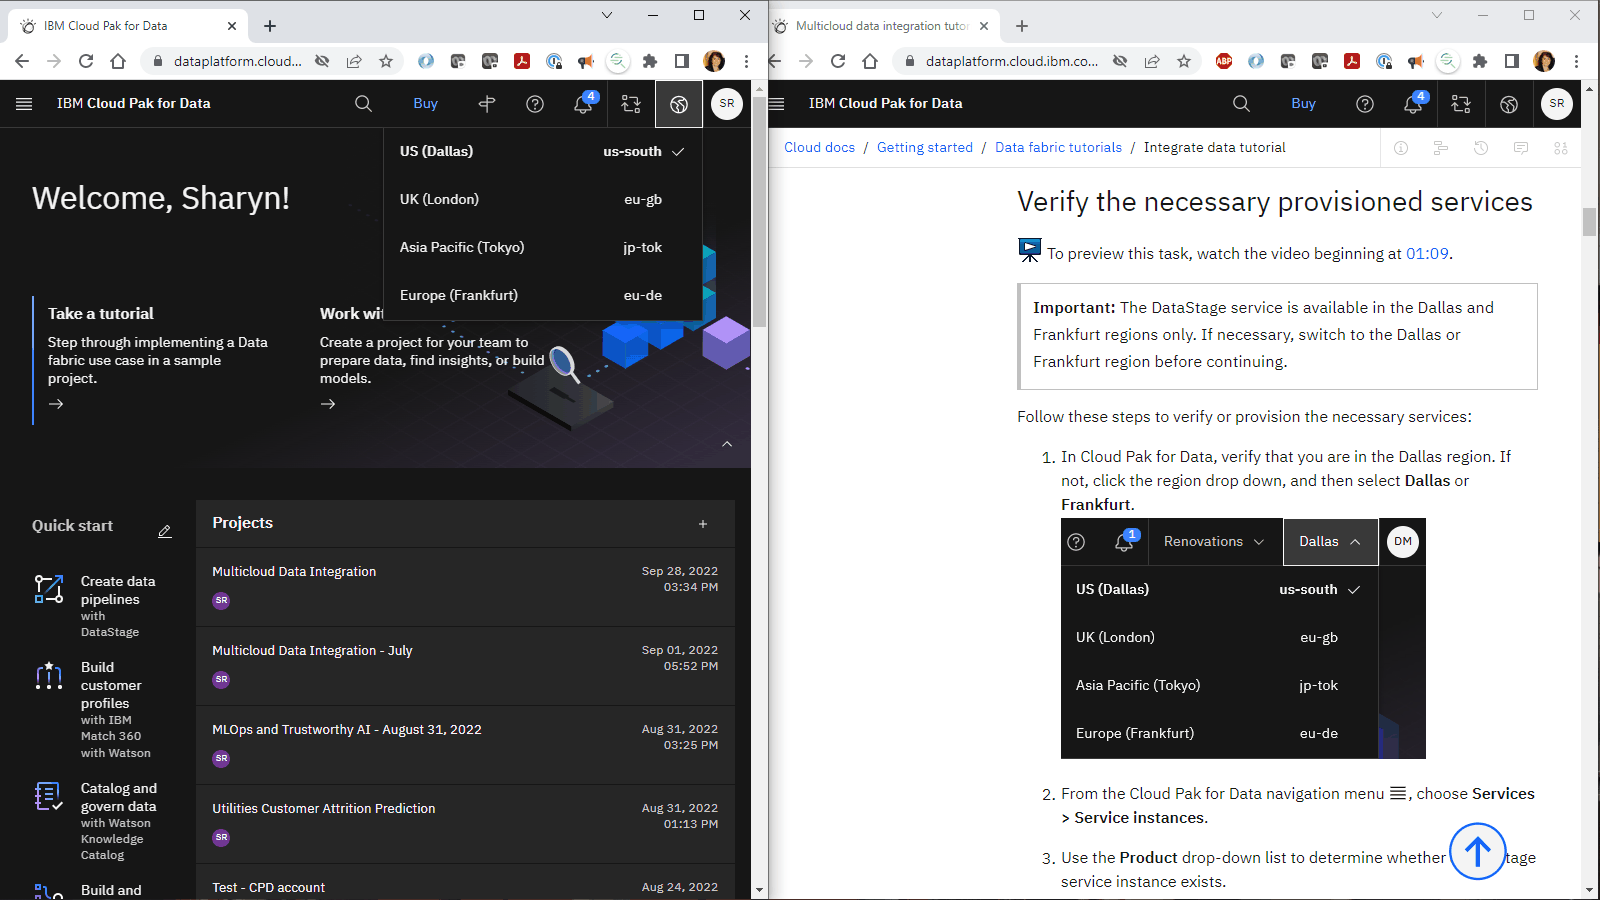
Set up your browser windows
For the optimal experience completing this tutorial, open Cloud Pak for Data in one browser window, and keep this tutorial page open in another browser window to switch easily between the two applications. Consider arranging the two browser windows side-by-side to make it easier to follow along.

Task 1: Open a project
You need a project to store the data set and the DataStage flow, and you need to provision the DataStage service. Follow these steps to open an existing project or create a new project and provision the service:
-
From the Navigation Menu
, choose Projects > View all projects
-
If you have an existing project, open it.
-
If you don't have an existing project, then click New project.
-
Select Create an empty project.
-
Enter a name and optional description for the project.
-
Click Create.
-
From the Navigation Menu
, click Services > Service instances.
-
Click Add service and select DataStage.
-
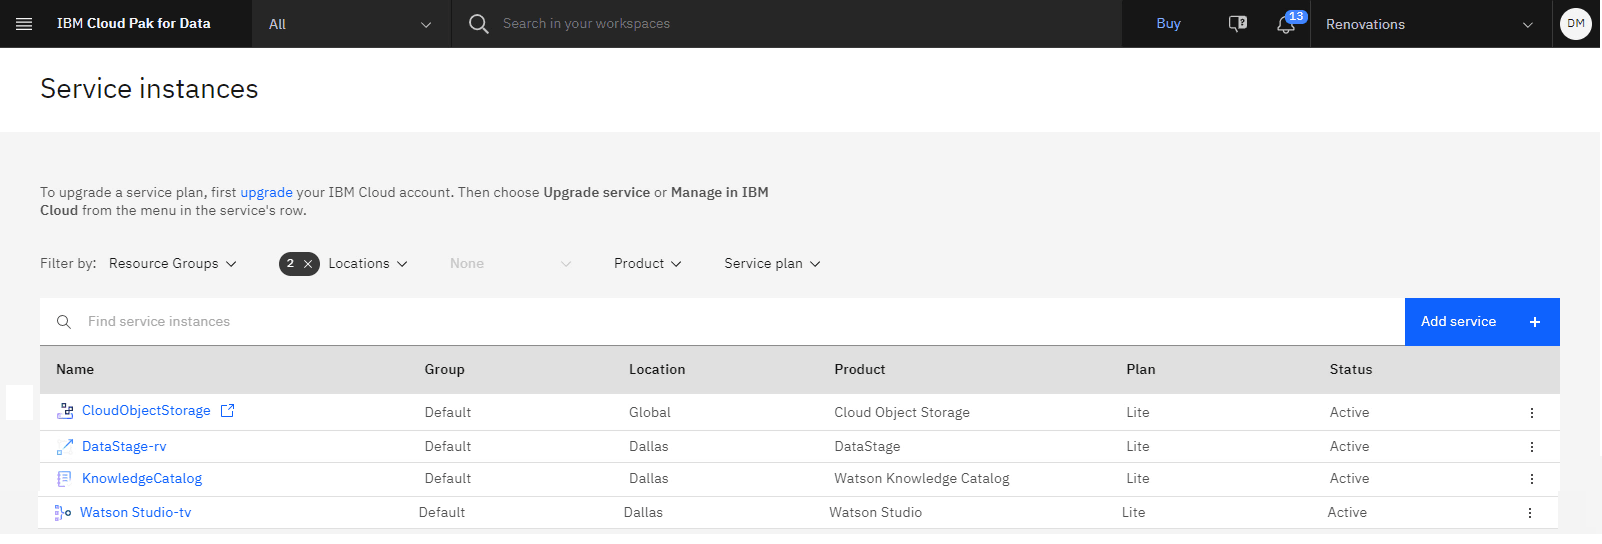
Click Create. You will see the provisioned service on your Service instances page.
For more information or to watch a video, see Creating a project.
 Check your progress
The following image shows the provisioned services.

Task 2: Add the data set to your project
The data set used in this tutorial is available in the Resource hub. Follow these steps to find the data set in the Resource hub and add it to your project:
-
Access the Customers data set in the Resource hub.
-
Click Add to project.
-
Select the project from the list, and click Add.
-
After the data set is added, click View Project.
For more information on adding data assets from the Resource hub to your project, see Loading and accessing data in a notebook.
 Check your progress
The following image shows the Assets tab in the project.

Task 3: Create a DataStage flow
 To preview this task, watch the video beginning at 00:26.
The DataStage flow will contain four nodes: the original data asset, a filter node, a sort node, and the transformed data asset. Follow these steps to create the DataStage flow:
-
Click New asset > Transform and integrate data.
-
Provide a name and description, and then click Create.
-
Click Connectors then drag and drop the Asset browser node onto the canvas.
-
Select Data Asset > customers.csv, and click Add.
-
In the Node palette, expand the Stages section, and then drag the Filter node to the canvas.
-
To link the nodes together, click the blue arrow on the Customers.csv node and drag it to the Filter node.
-
On the Stages section, drag the Sort node to the canvas.
-
Connect the Filter node to the Sort node.
-
Expand the Connectors section, and then drag the Asset browser node on the canvas.
-
Select Data Asset > customers.csv, and click Add. You will change the file name later so you do not overwrite the customer.csv file.
-
Connect the Sort node to this last Customers.csv node.
 Check your progress
The following image shows the initial flow.

Task 4: Edit the nodes
 To preview this task, watch the video beginning at 03:27.
Follow these steps to edit the properties for each node on the canvas:
Node 1: Edit the first Asset browser node
-
Double-click the first Customer.csv node.
-
In the Properties panel on the right, rename the node to
CustomerTableto rename the asset node. -
Click the Output tab.
-
Expand the Columns section, and click Edit.
-
For the YTD_SALES column, for the Data type and select DECIMAL to change the data type of the YTD_SALES column.
-
Click Apply and return to return to the Properties panel.
-
Click Save to save the changes to the Customer Table node.
Node 2: Edit the Filter node
-
Double-click the Filter node.
-
In the Properties panel, rename the text
Filter_1toFilterYTDSalesto rename the filter node. -
Expand the Properties section. Under Predicates, click Edit.
-
Under the Where clause column, type
YTD_SALES > 1000. -
Click Apply and return.
-
-
Click the Output tab.
-
Expand the Columns section, and click Edit.
-
Select all columns and deselect the following columns listed below that will be kept for this tutorial.
- CUST_ID
- CUSTNAME
- COUNTRY_CODE
- EMAIL_ADDRESS
- PHONE_NUMBER
- YTD_SALES
- SALESREP_ID
-
Click the Delete selected rows icon
to delete the remaining selected columns.
-
For the CUSTNAME column, rename it to
CUSTOMERNAME. This change will propagate down to the nodes that follow the Filter node. -
Click Apply and return to return to the Properties panel.
-
-
Click Save to save the changes to the Filter node.
Node 3: Edit the Sort node
-
Double-click the Sort node.
-
In the Properties panel, rename the text
Sort_1toSortYTDSalesto rename the sort node. -
Expand the Properties section.
-
Under Sorting Keys, click Add key.
-
Click Add key.
-
From the Key drop-down, select YTD_SALES.
-
For the Sort order, select Descending.
-
Click Apply to return to the sorting keys list.
-
Click Apply and return to return to the Properties panel.
-
-
Click the Input tab, and expand the Columns section to verify that the CUSTOMERNAME column name change propagated down from the Filter node.
-
Click the Output tab, and expand the Columns section to verify that the CUSTOMERNAME column name change propagated down from the Filter node.
-
Click Save to save the changes to the Sort node.
Node 4: Edit the last Asset browser node
-
Double-click the last Customers.csv node.
-
In the Properties panel, rename the node to
CustomerFilteredTableto rename the asset node. -
Expand the Properties section, and select the check box Create data asset.
-
For the Data asset name field, type
Customers filtered. -
Click the Input tab, and expand the Columns section to verify that the CUSTOMERNAME column name change propagated down from the Filter node.
-
Click Save to save the changes to the Customers filtered table node.
 Check your progress
The following image shows the final flow.

Task 5: Run your DataStage flow and view your asset
 To preview this task, watch the video beginning at 06:36.
You are now ready to run the flow. Follow these steps to run the flow and view the transformed asset in the project:
-
Click Save.
-
Click Compile.
-
Click Run.
-
(Optional) Click the Log link to view the run details.
-
Double-click the last Customers filtered table node.
-
Expand the Properties section.
-
Scroll down, and click Preview data. You can see that the data was filtered and sorted correctly.
-
Click the Chart panel.
-
For the Columns to visualize, select YTD_SALES.
-
For the Chart type, click Q-Q plot.
-
Click Close.
-
-
Since you set up the flow to create a data asset in the project, click the project name in the navigation trail to return to your project.
-
On the Assets tab, open the Customers filtered asset.
 Check your progress
The following image shows the customers filtered data asset.

Next steps
Now the data is ready to be used. For example, you or other users can do any of these tasks:
Additional resources
-
View more videos.
-
Find sample data sets to gain hands-on experience transforming data in the Resource hub.
-
Start with the sample DataStage project: COVID-19 Tracking with IBM DataStage.
-
Try this additional tutorial to get more hands-on experience with DataStage flows: Get started using the new IBM DataStage service
 .
.
Parent topic: Quick start tutorials