You can view and run a built-in sample pipeline that uses sample data to learn how to automate machine learning flows in Watson Pipelines.
What's happening in the sample pipeline?
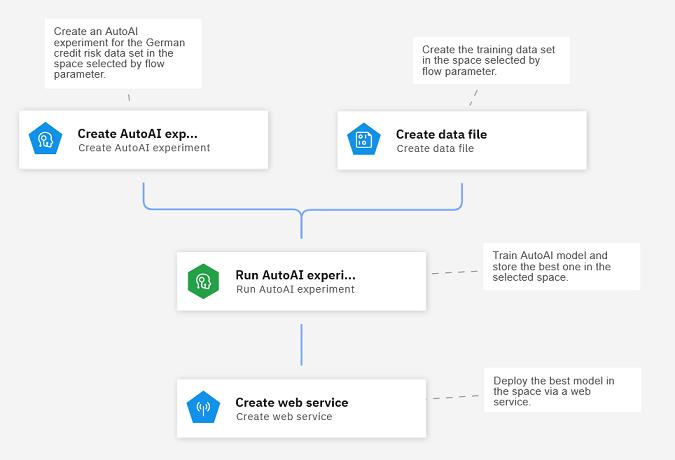
The sample pipeline gets training data, trains a machine learning model using the AutoAI tool, and selects the best pipeline to save as a model. The model is then copied to a deployment space where is deployed.
The sample illustrates how you can automate an end-to-end flow to make the lifecycle easier to run and monitor.
The sample pipeline looks like this:

The tutorial steps you through this process:
Prerequisites
To run this sample, you must first create:
- A project, where you can run the sample pipeline.
- A deployment space, where you can view and test the results. The deployment space is required to run the sample pipeline.
Preview creating and running the sample pipeline
Watch this video to see how to create and run a sample pipeline.
This video provides a visual method to learn the concepts and tasks in this documentation.
Creating the sample pipeline
Create the sample pipeline in the Pipelines editor.
-
Open the project where you want to create the pipeline.
-
From the Assets tab, click New task > Automate model lifecycle.
-
Enter a unique name for the pipeline. For example, enter Bank marketing sample.
-
Click Create to open the canvas.
-
Click the Samples tab, and select the Orchestrate an AutoAI experiment.
Running the sample pipeline
To run the sample pipeline:
-
Click Run pipeline on the canvas toolbar, then choose Trial run.
-
Select a deployment space when prompted to provide a value for the deployment_space pipeline parameter.
-
Click Select Space.
-
Expand the Spaces section.
-
Select your deployment space.
-
Click Choose.
-
-
Provide an API key if this occasion is your first time running a pipeline. Pipeline assets use your personal IBM Cloud API key to run operations securely without disruption.
-
If you have an existing API key, click Use existing API key, paste the API key, and click Save.
-
If you don't have an existing API key, click Generate new API key, provide a name, and click Save. Copy the API key, and then save the API key for future use. When you're done, click Close.
-
-
Click Run to start the pipeline.
Reviewing the results
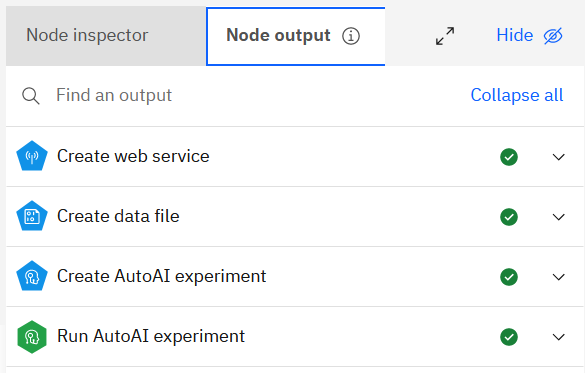
When the pipeline run completes, you can view the output to see the results.

Open the deployment space you specified as part of the pipeline. You will see the new deployment in the space:

If you want to test the deployment, use the deployment space Test page to submit payload data in JSON format and get a score back. For example, click the JSON tab and enter this input data:
{"input_data": [{"fields": ["age","job","marital","education","default","balance","housing","loan","contact","day","month","duration","campaign","pdays","previous","poutcome"],"values": [["30","unemployed","married","primary","no","1787","no","no","cellular","19","oct","79","1","-1","0","unknown"]]}]}
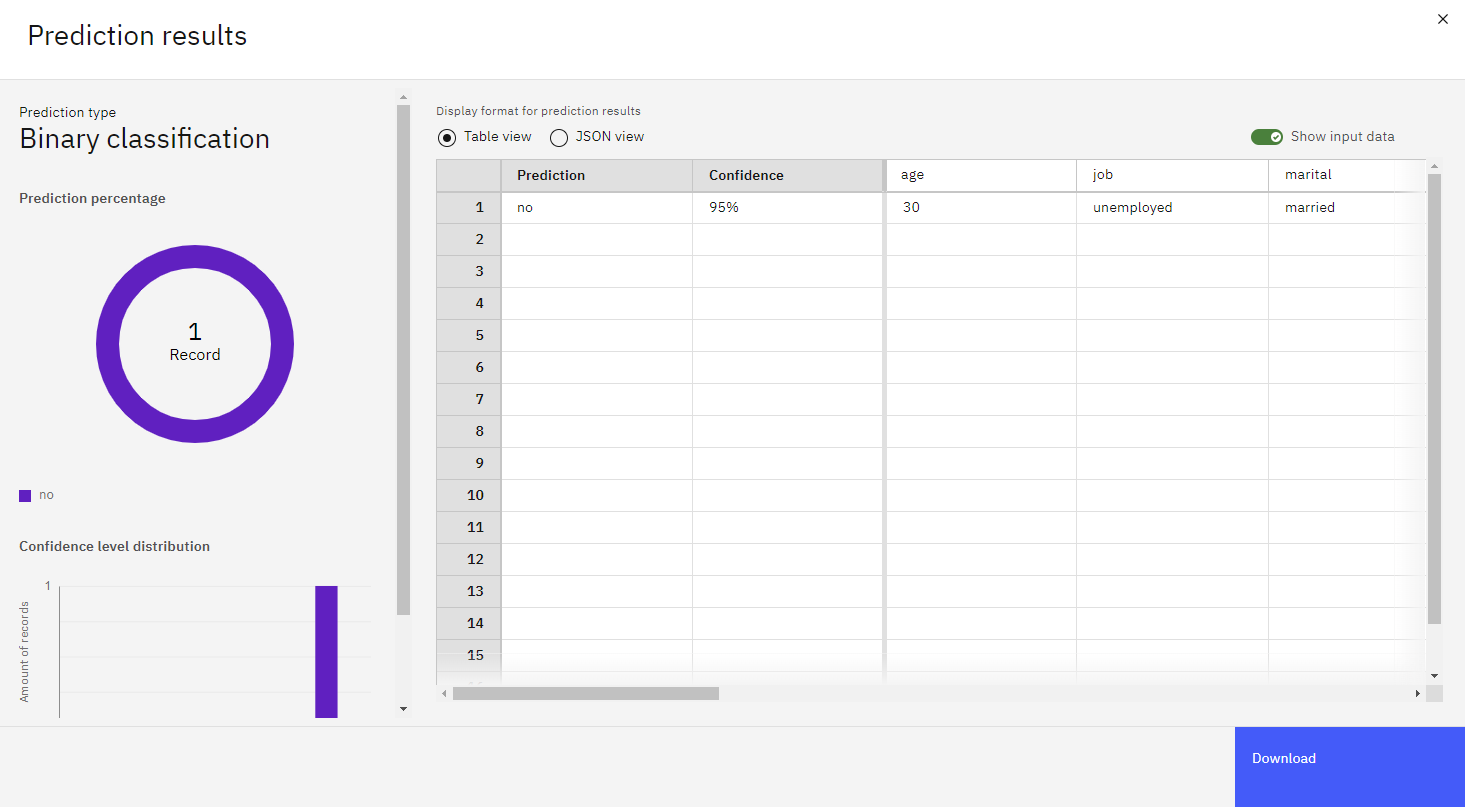
When you click Predict, the model generates output with a confidence score for the prediction of whether a customer will subscribe to a term deposit promotion.

In this case, the prediction of "no" is accompanied by a confidence score of close to 95%, predicting that the client most likely will not subscribe to a term deposit.
Exploring the sample nodes and configuration
Get a deeper understanding of how the sample nodes were configured to work in concert in the pipeline sample.
Viewing the pipeline parameter
A pipeline parameter specifies a setting for the entire pipeline. In the sample pipeline, a pipeline parameter is used to specify a deployment space where the model saved from the AutoAI experiment is stored and deployed. You are prompted to select the deployment space the pipeline parameter will link to.
Click the Global objects icon on the canvas toolbar to view or create pipeline parameters. In the sample pipeline, the pipeline parameter is named deployment_space and is of type Space. Click the name of the pipeline parameter to view the details. In the sample, the pipeline parameter is used with the Create data file node and the Create AutoAI experiment node.

Loading the training data for the AutoAI experiment
In this step, a Create data file node is configured to access the data set for the experiment. Click the node to view the configuration. The data file is bank-marketing-data.csv, which provides sample data to
predict whether a bank customer will sign up for a term deposit. The data resides in a Cloud Object Storage bucket and can be refreshed to keep the model training up-to-date.
| Option | Value |
|---|---|
| File | The location of the data asset for training the AutoAI experiment. In this case, the data file is in a project. |
| File path | The name of the asset, bank-marketing-data.csv. |
| Target scope | For this sample, the target is a deployment space. |
Creating the AutoAI experiment
The node to Create AutoAI experiment is configured with these values:
| Option | Value |
|---|---|
| AutoAI experiment name | onboarding-bank-marketing-prediction |
| Scope | For this sample, the target is a deployment space. |
| Prediction type | binary |
| Prediction column (label) | y |
| Positive class | yes |
| Training data split ration | 0.9 |
| Algorithms to include | GradientBoostingClassifierEstimator XGBClassifierEstimator |
| Algorithms to use | 1 |
| Metric to optimize | ROC AUC |
| Optimize metric (optional) | default |
| Hardware specification (optional) | default |
| AutoAI experiment description | This experiment uses a sample file, which contains text data collected from phone calls to a Portuguese bank in response to a marketing campaign. The classification goal is to predict whether a client will subscribe to a term deposit, represented by variable y. |
| AutoAI experiment tags (optional) | none |
| Creation mode (optional) | default |
Those options define an experiment that uses the bank marketing data to predict whether a customer is likely to enroll in a promotion.
Running the AutoAI experiment
In this step, the Run AutoAI experiment node runs the AutoAI experiment onboarding-bank-marketing-prediction, trains the pipelines, then saves the best model.
| Option | Value |
|---|---|
| AutoAI experiment | Takes the output from the Create AutoAI node as the input to run the experiment. |
| Training data assets | Takes the output from the Create Data File node as the training data input for the experiment. |
| Model count | 1 |
| Holdout data asset (optional) | none |
| Models count (optional) | 3 |
| Run name (optional) | none |
| Model name prefix (optional) | none |
| Run description (optional) | none |
| Run tags (optional) | none |
| Creation mode (optional) | default |
| Error policy (optional) | default |
Deploying the model to a Web service
The Create Web deployment node creates an online deployment named onboarding-bank-marketing-prediction-deployment so you can deliver data and get predictions back in real time from the REST API endpoint.
| Option | Value |
|---|---|
| ML asset | Takes the best model output from the Run AutoAI node as the input to create the deployment. |
| Deployment name | onboarding-bank-marketing-prediction-deployment |
Parent topic: IBM Watson Pipelines