You can create online deployments for SPSS Modeler flows that use multiple input streams to provide data to the model.
Process overview
When you use multiple input streams to create an SPSS Modeler flow, you can create an online deployment for your model.
The following graphic shows an SPSS Modeler flow that uses two input streams. The flow processes the data and creates a machine learning model. You can save this model and create an online deployment. After deploying the model, you can use the endpoint for scoring with your applications.

Tasks for deploying multi-source SPSS Modeler flows
You can create and deploy a multi-source SPSS Modeler flow from the user interface or watsonx.ai REST API.
Creating and deploying models from the user interface
Follow these steps to create and deploy a multi-source SPSS Modeler flow from the user interface:
- Create an SPSS Modeler flow: You can create a multi-source model in your Project by creating an SPSS Modeler flow.
- Promote the model asset: After creating the model, promote the asset for you model from your Project to your deployment space.
- Deploy the model: Create an online deployment to use the endpoint for scoring.
- Test the deployed model: Score against the deployed model.
Creating and deploying models from the REST API
Follow these steps to create and deploy a multi-source SPSS Modeler flow from the watsonx.ai REST API:
- Create a model: You can create a multi-source model by providing a schema.
- Upload the model content: After creating the model, you must upload the content for the model in a respository asset in watsonx.ai Runtime.
- Deploy the model: Create an online deployment to use the endpoint for scoring.
- Test the deployed model: Score against the deployed model.
Creating and deploying multi-source models from the user interface
Follow these steps to create multi-source models in SPSS Modeler and deploy the models from the user interface.
Task 1: Create a multi-source model in SPSS Modeler
You can create a multi-source model by creating an SPSS Modeler flow. For more information, see Creating SPSS Modeler flows.
Task 2: Promote the model asset
To deploy your mode, you must promote the model asset created by using SPSS Modeler to your deployment space. For more information, see Promoting assets to a deployment space.
Task 3: Deploying multi-source models
Follow these steps to create an online deployment for a machine learning model that is created with multiple input sources in SPSS Modeler:
Prerequisites
You must set up your task credentials for deploying your AI services. For more information, see Managing task credentials.
-
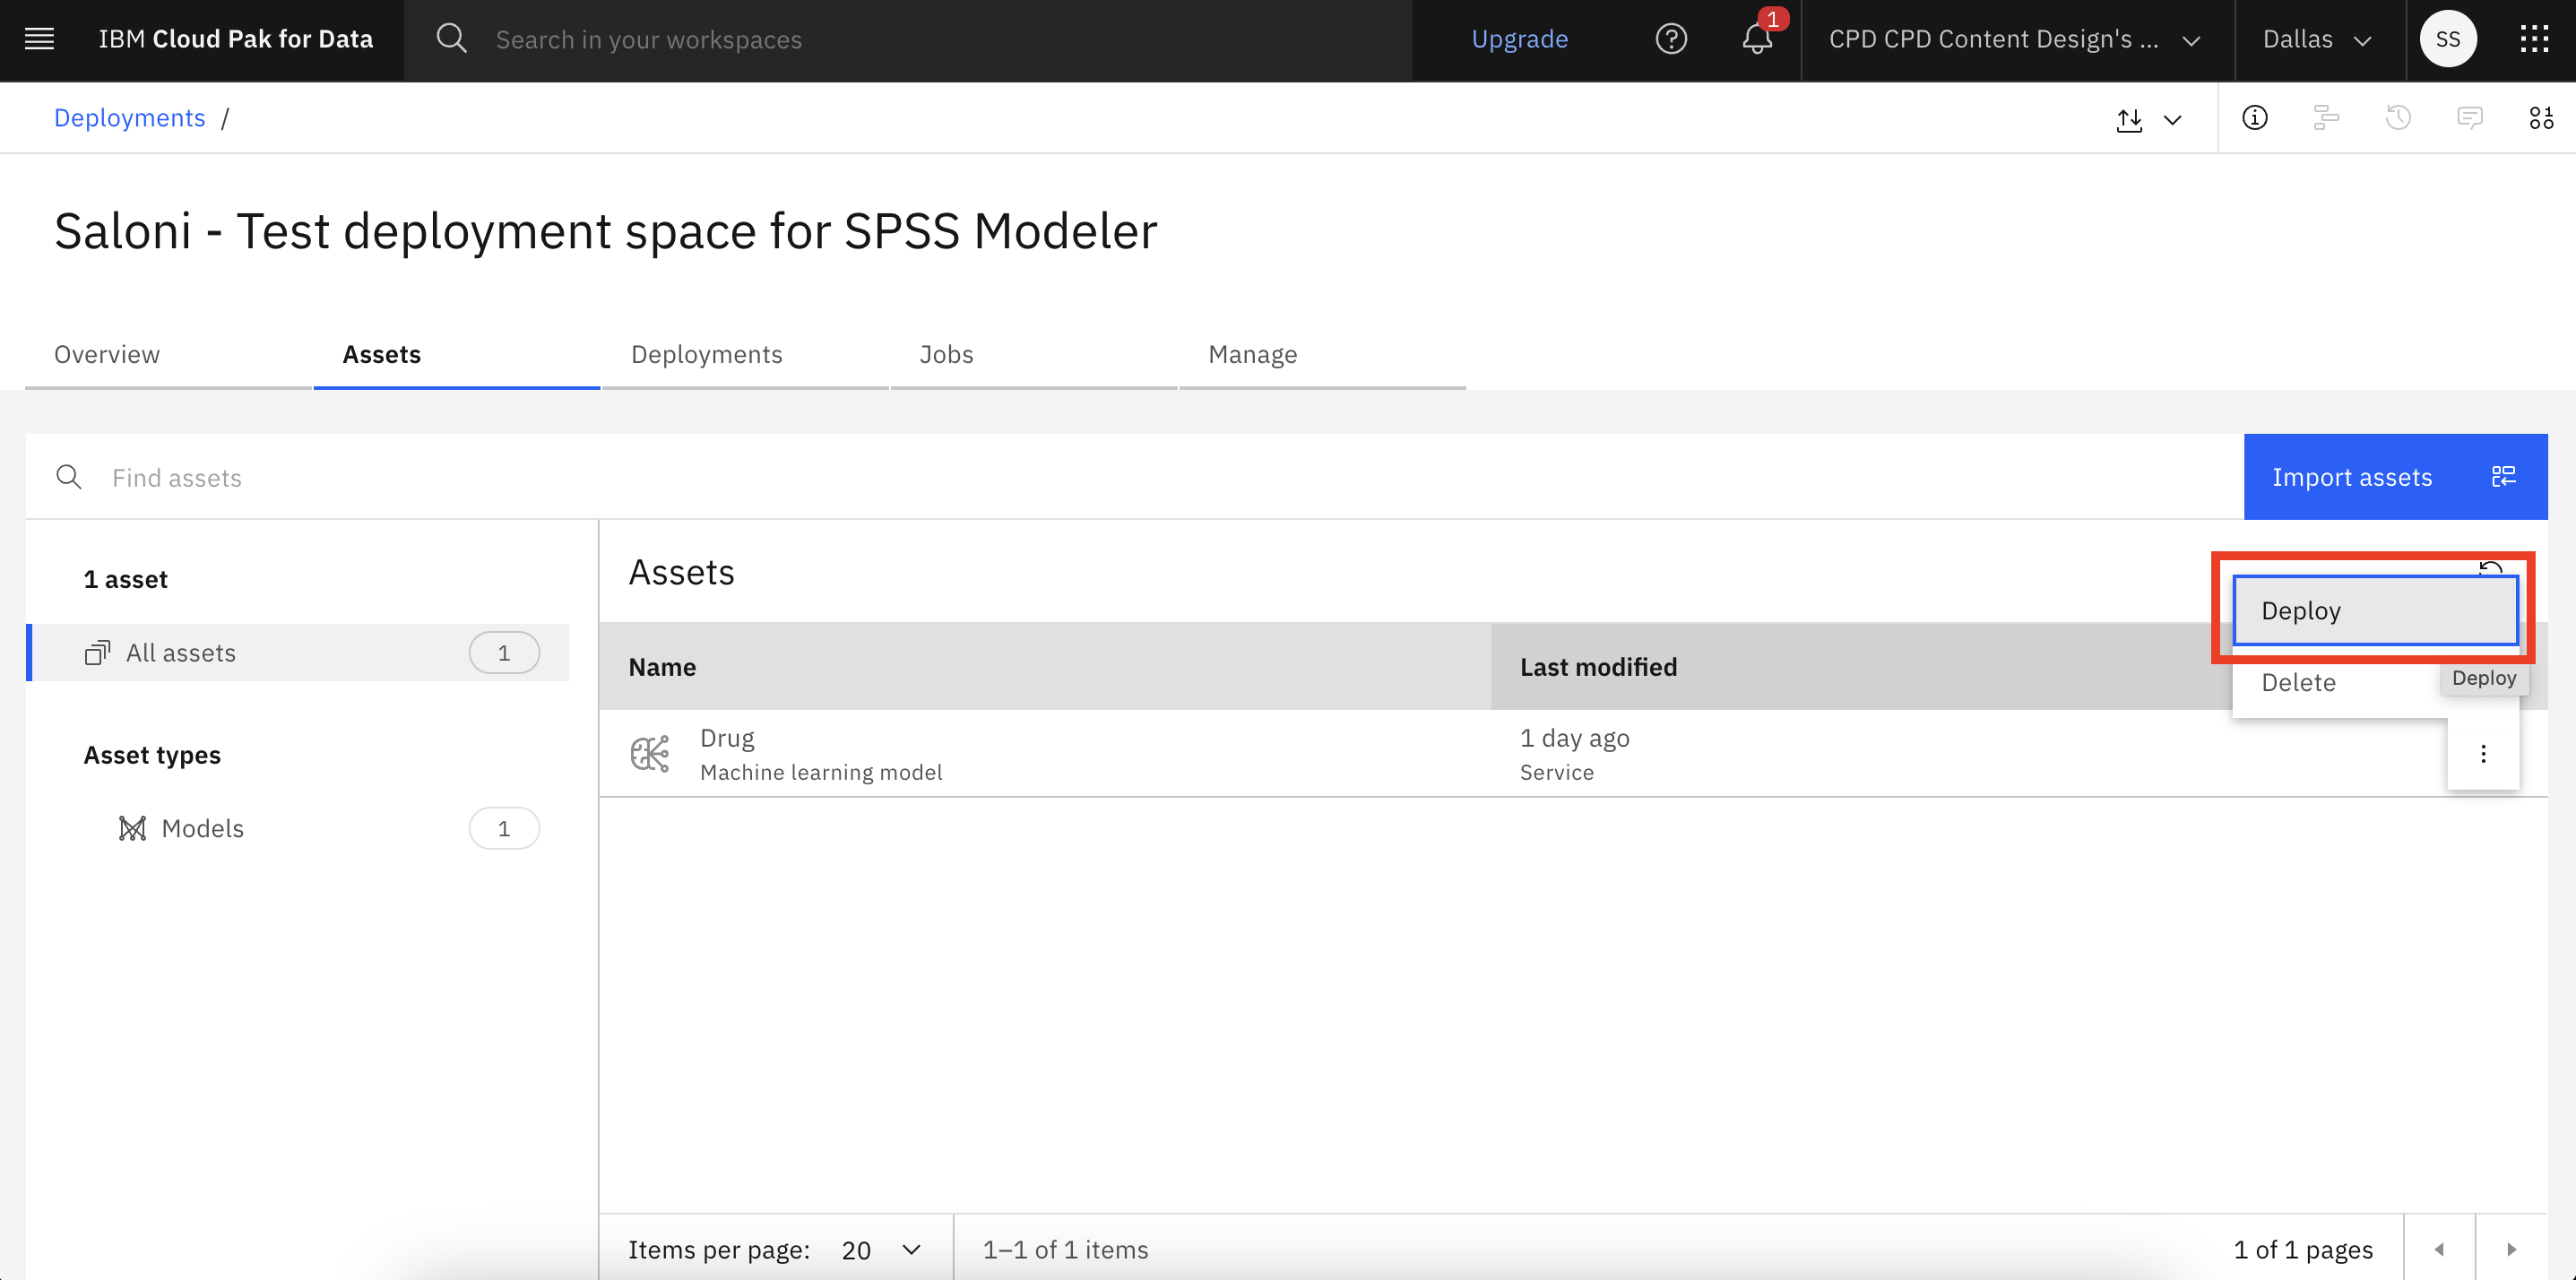
From your deployment space, go to the Assets tab.
-
For your machine learning model, click the Menu icon and select Deploy.

-
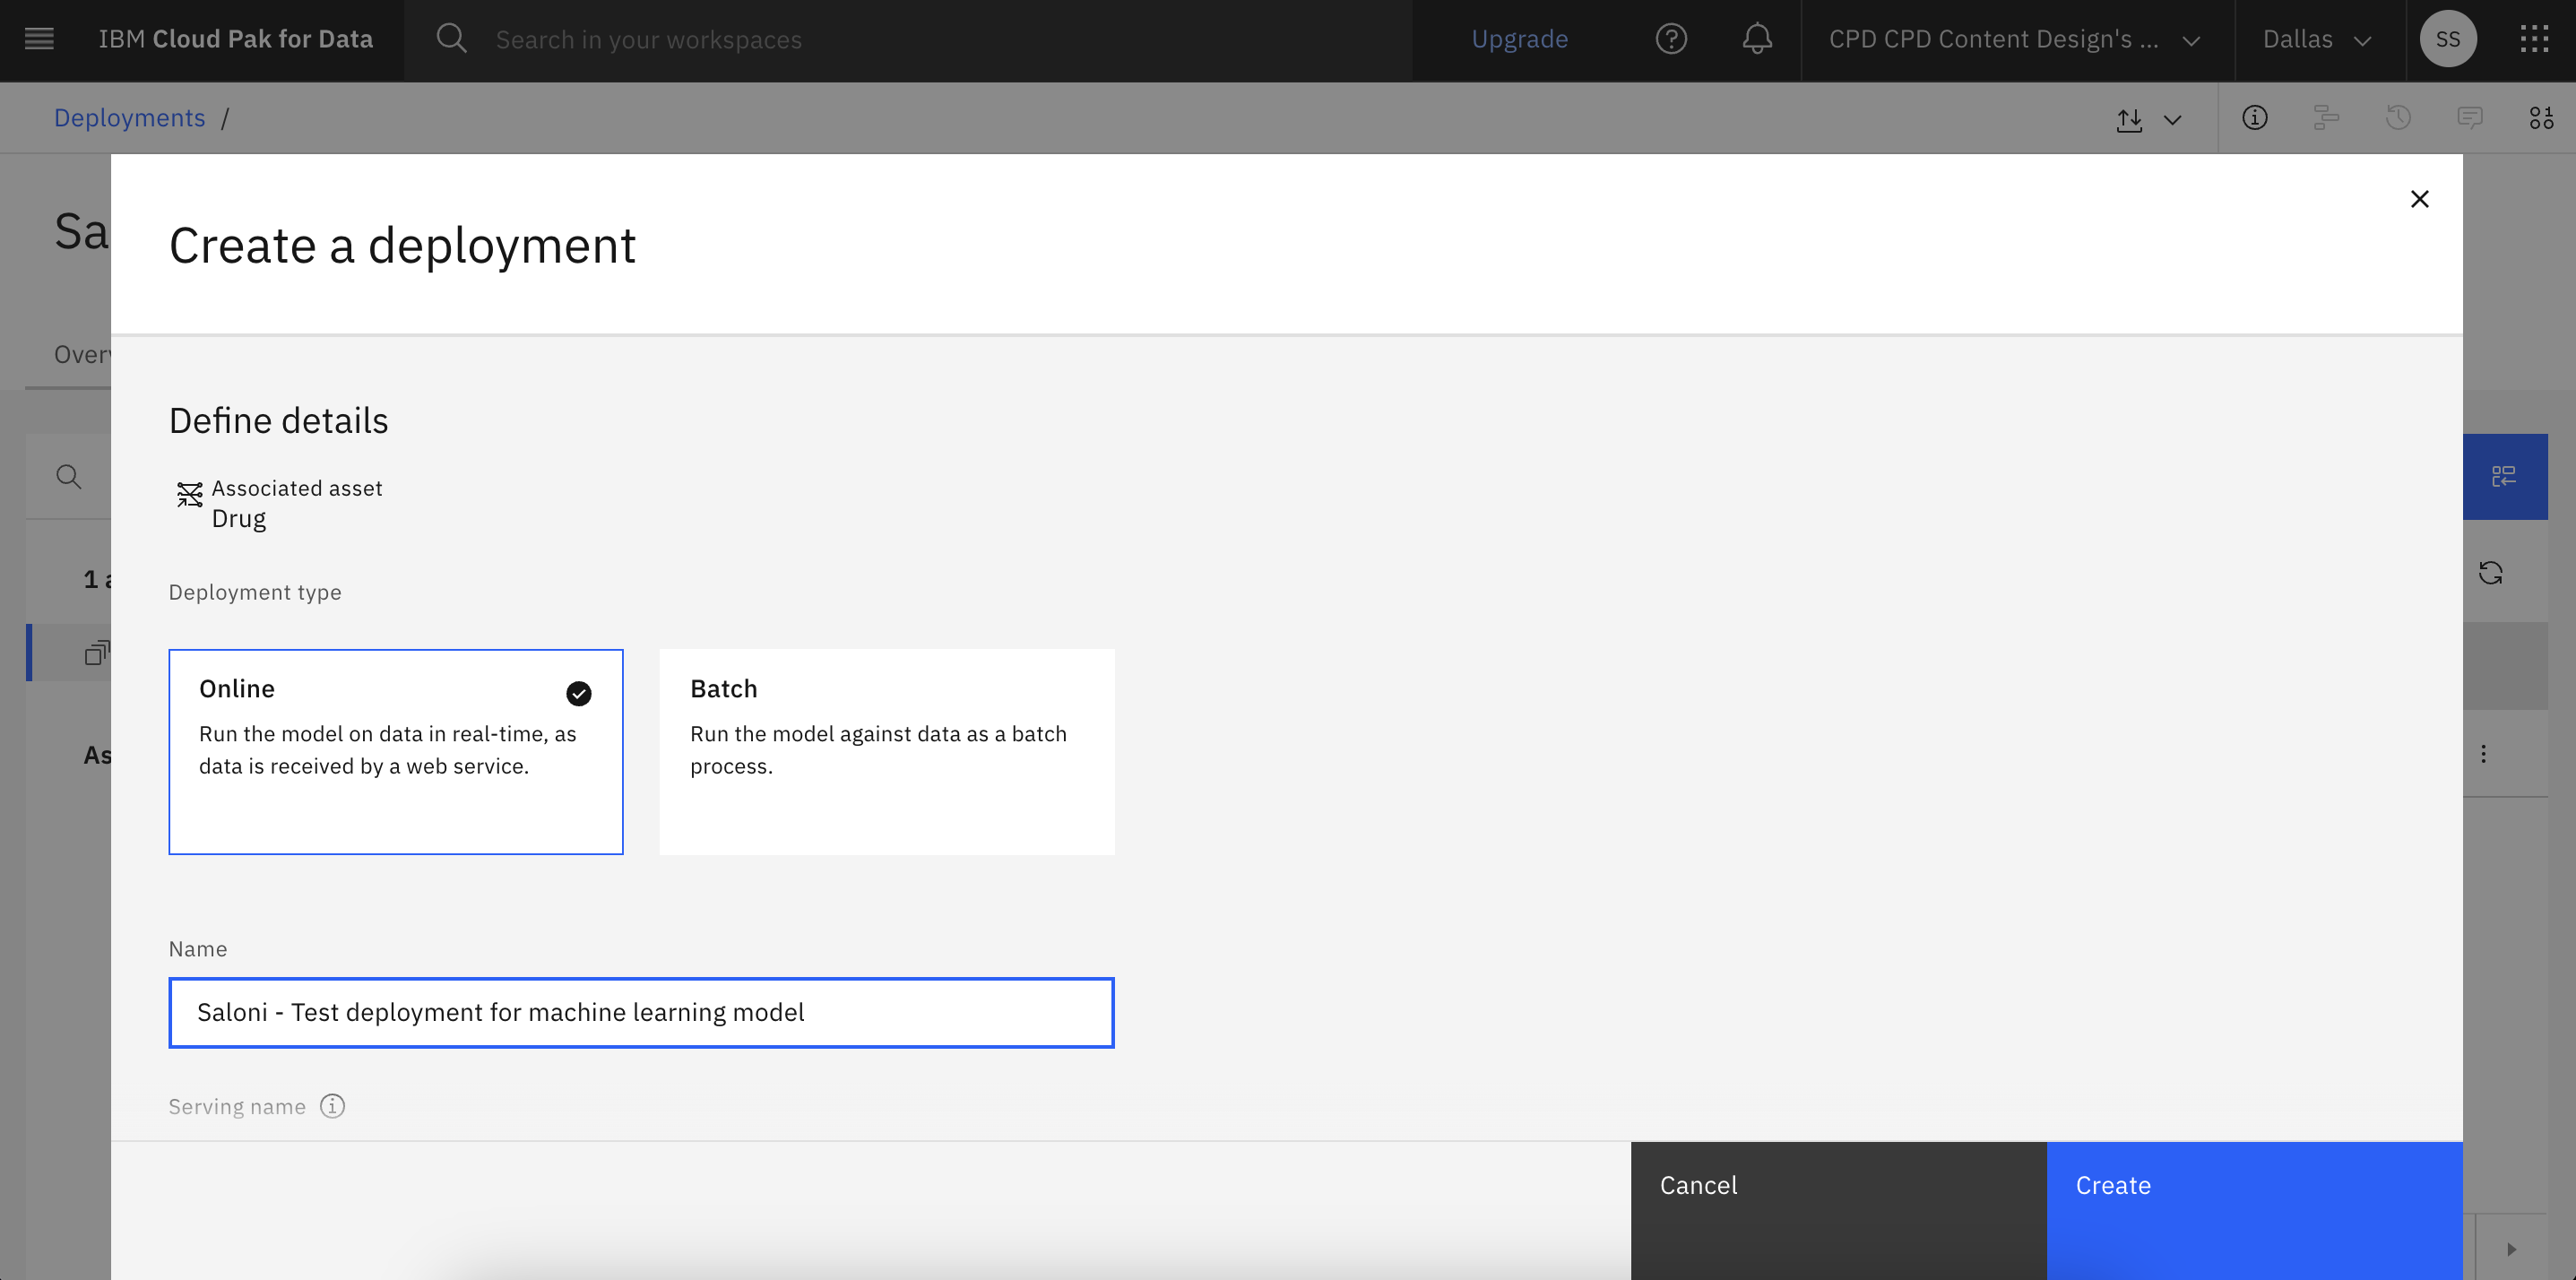
Select Online as the deployment type.

-
Enter a name for your deployment and optionally enter a serving name, description, and tags.
-
Click Create.
Task 4: Testing the deployed model
You can score your deployed model by providing input in text or JSON format.
Follow these steps for scoring your deployed model:
- In your deployment space or your project, open the Deployments tab and click the deployment name.
- Click the Test tab to input prompt text and get a response from the deployed asset.
- Enter test data in text or JSON format to generate output.
Creating and deploying multi-source SPSS Modeler flows with REST API
Follow these steps to create multi-source models in SPSS Modeler and deploy the models from the watsonx.ai REST API.
Task 1: Creating a multi-source model with SPSS Modeler
You can create a model with multiple input sources by using SPSS Modeler.
Requirements for model schema in JSON format
When you create a model a multi-input model schema in JSON format, your schema must meet the following requirements:
| Component | Description |
|---|---|
| Structure | Each object must contain id, fields, and values. |
| ID | Must be a string. |
| Fields | Must be an array of strings. |
| Values | Must be an array of arrays. |
| Value items | Each item within values must be an array. |
The following code shows how to create a model with schema:
curl -H "Authorization: Bearer <TOKEN>" \
-H "content-type: application/json" \
--request POST '<HOSTURL>/ml/v4/models?version=2020-06-12' \
--data-raw '{
     "name": "spss-multi-source-user-input-table-output",
     "space_id": "<SPACE ID>",
     "description": "This is my first resource.",
     "software_spec": {
      "id": "687eddc9-028a-4117-b9dd-e57b36f1efa5",
      "name": "spss-modeler_18.2"
    },
    "type": "spss-modeler_18.2",
    "schemas": {
      "input": [{
        "fields": [{
          "metadata": {

          },
          "name": "customerID",
          "nullable": true,
          "type": "string"
        }, {
          "metadata": {
          },
          "name": "gender",
          "nullable": true,
          "type": "string"
        }, {
          "metadata": {
          },
          "name": "SeniorCitizen",
          "nullable": true,
          "type": "integer"
        }, {
          "metadata": {
          },
          "name": "Partner",
          "nullable": true,
          "type": "string"
        }, {
          "metadata": {
          },
          "name": "Dependents",
          "nullable": true,
          "type": "string"
        }, {
          "metadata": {
          },
          "name": "tenure",
          "nullable": true,
          "type": "string"
        }, {
          "metadata": {
          },
          "name": "PhoneService",
          "nullable": true,
          "type": "string"
        }, {
          "metadata": {
          },
          "name": "MultipleLines",
          "nullable": true,
          "type": "string"
        }, {
          "metadata": {
          },
          "name": "InternetService",
          "nullable": true,
          "type": "string"
        }, {
          "metadata": {
          },
          "name": "OnlineSecurity",
          "nullable": true,
          "type": "string"
        }, {
          "metadata": {
          },
          "name": "OnlineBackup",
          "nullable": true,
          "type": "string"
        }, {
          "metadata": {
          },
          "name": "DeviceProtection",
          "nullable": true,
          "type": "string"
        }, {
          "metadata": {
          },
          "name": "TechSupport",
          "nullable": true,
          "type": "string"
        }, {
          "metadata": {
          },
          "name": "StreamingTV",
          "nullable": true,
          "type": "string"
        }, {
          "metadata": {
          },
          "name": "StreamingMovies",
          "nullable": true,
          "type": "string"
        }, {
          "metadata": {
          },
          "name": "Contract",
          "nullable": true,
          "type": "string"
        }, {
          "metadata": {
          },
          "name": "PaperlessBilling",
          "nullable": true,
          "type": "string"
        }, {
          "metadata": {
          },
          "name": "PaymentMethod",
          "nullable": true,
          "type": "string"
        }],
        "id": "id5B2XR2L3LS6",
        "name": "uinode1",
        "type": "struct"
      }, {
        "fields": [{
          "metadata": {
          },
          "name": "MonthlyCharges",
          "nullable": true,
          "type": "double"
        }, {
          "metadata": {
          },
          "name": "TotalCharges",
          "nullable": true,
          "type": "double"
        }, {
          "metadata": {
          },
          "name": "Churn",
          "nullable": true,
          "type": "string"
        }, {
          "metadata": {
          },
          "name": "SampleWeight",
          "nullable": true,
          "type": "double"
        }],
        "id": "id3YXBN73TTS",
        "name": "uinode2",
        "type": "struct"
      }],
      "output": [{
        "fields": [{
          "metadata": {
          },
          "name": "Churn",
          "nullable": true,
          "type": "string"
        }, {
          "metadata": {
          },
          "name": "customerID",
          "nullable": true,
          "type": "string"
        }, {
          "metadata": {
          },
          "name": "Predicted Churn",
          "nullable": true,
          "type": "string"
        }, {
          "metadata": {
          },
          "name": "Probability of Churn",
          "nullable": true,
          "type": "double"
        }],
        "id": "id6BPTTYFV44A",
        "name": "Output data",
        "type": "struct"
      }]
    }
}'
Task 2: Upload the model content
You must upload the content of your model to create a repository asset in watsonx.ai Runtime.
The following code shows how to upload the model content to create a model asset:
curl -vk -X PUT "<HOSTURL>/ml/v4/models/<MODELID OBTAINED FROM STEP1 RESPONSE>/content?version=2020-08-08&content_format=native&space_id=<SPACEID>" -H "Authorization: Bearer <TOKEN>" --data-binary @/PATH/WHERE/ZIP/IS/AVAILABLE/exsistingmultipleuserinputtableoutput.zip
Task 3: Deploying the model
You can use the /ml/v4/deployments endpoint to create an online deployment for your multi-input model created with SPSS Modeler flow.
Prerequisites
You must have an existing IBM Cloud API key or generate a new API key.
The following code sample shows how to create an online your multi-input model with the watsonx.ai REST API:
curl --request POST \
  --url '<HOST>/ml/v4/deployments?version=2023-03-10' \
  --header 'Authorization: Bearer <TOKEN>' \
  --header 'Content-Type: application/json' \
  --data '{
	"asset": {
		"id": "<MODEL ID FROM FIRST STEP>"
	},
	"description": "Multi Source Online Deployment",
	"name": "spss_multi_source_online_deployment",
	"space_id": "<SPACE ID>",
	"online": {
	  "parameters": {
		"serving_name": "spssmultisource"
	  }
	}
}'
Task 4: Testing the deployed model
You can score against the deployed model by entering input data in JSON format that matches the schema of your model.
The following code sample shows how pass input data in JSON format and use the REST API to score against the deployed model:
curl -H "Authorization: Bearer <TOKEN>" \
-H "content-type: application/json" \
--request POST '<HOST>/ml/v4/deployments/<DEPLOYMENT_ID RECEIVED FROM STEP 3>/predictions?version=2020-06-12' \
--data-raw '{
     "input_data": [
    {
      "id": "uinode1",
      "fields": ["customerID","gender","SeniorCitizen","Partner","Dependents","tenure","PhoneService","MultipleLines","InternetService","OnlineSecurity","OnlineBackup","DeviceProtection","TechSupport","StreamingTV","StreamingMovies","Contract","PaperlessBilling","PaymentMethod"],
       "values":[["3638-WEABW","Female",0,"Yes","No","58","Yes","Yes","DSL","No","Yes","No","Yes","No","No","Two year","Yes","Credit card (automatic)"]]
    },
    {
      "id": "uinode2",
      "fields": ["MonthlyCharges","TotalCharges","Churn","SampleWeight"],
      "values":[[59.9,3505.1,"No",2.768]]
    }
  ]
}'
Output
{"predictions":[{"fields":["Churn","customerID","Predicted Churn","Probability of Churn"],"values":[["No","3638-WEABW","No",0.0526309571556145]]}]}