0 / 0
Changing default environments and adding Python extensions for additional Python libraries
Last updated: Dec 05, 2024
Decision Optimization experiment default environments, Python and CPLEX runtime versions and Python extensions

You can change the default environment for your experiment from the Overview tab. For example, you can change the Python version or CPLEX version that is used by default. You can also create a new environment and add more Python libraries by using a new Python extension.

Before you begin

Required permissions
To view environments, you can have any role in a deployment space. To edit or create environments, you must have the Editor or Admin role in the space. For more information, see Deployment space collaborator roles and permissions.

About this task

When you use the Decision Optimization experiment UI, the necessary environments are created for you automatically. However, you might want to configure your environment to use a particular version of Python, hardware, CPLEX or use Python extensions. You can configure the environment to be used for your solve, by changing the default environment. This environment is then applied to all scenarios in your experiment, when you click Run.

The environment depends on your model type: Python, OPL, CPLEX, CPO, or Modeling Assistant. Python is used to run Decision Optimization models formulated in DOcplex in both Decision Optimization experiments and Jupyter Notebooks. Modeling Assistant models also use Python because DOcplex code is generated when models are run or deployed. Models that are formulated in OPL or in specific file formats for CPLEX or CP Optimizer, such as LP or CPO formats, do not use Python environments.

The Decision Optimization environment currently supports Python 3.11 and 3.10 (deprecated). The default version is Python 3.11.

Python versions are regularly updated. However, if you have explicitly specified an older Python version in your model, you must update this version specification or your model will no longer work. You can either create a new Python environment or edit one from Manage experiment environments.

Updating your environment is also useful if you want to select a different version of CPLEX for your default environment. As CPLEX engine performance improves with each new version, older versions are deprecated and removed over time. Runtimes, based on these engines, are used in building and deploying Decision Optimization models. Currently, the do_22.1 runtime, based on CPLEX 22.1 is used automatically when you create and run scenarios. The do_20.1 runtime based on CPLEX 20.1 is also available.

This video provides a visual method to learn the concepts and tasks in this documentation.

After you load the example in your Decision Optimization experiment, you can follow the video.

Video disclaimer: Some minor steps and graphical steps in this video might differ from your platform. The user interface is also frequently improved.

The following procedure shows you how to change the default environment for DOcplex and Modeling Assistant models. Changing the default environment can be useful for checking if your model works with the latest version of CPLEX, or for testing your model with larger data sets that require more hardware. Or perhaps you need to update the Python version or want to include some particular Python libraries using Python extensions.

Procedure

To change the default environment for DOcplex and Modeling Assistant models:

  1. Open the Overview, click the information icon information icon to open the Information pane, and select the Environments tab.

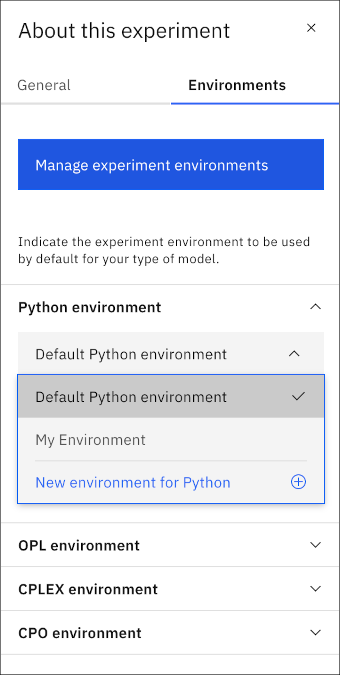
    Environment tab of information pane

  2. Expand the environment section according to your model type. For Python and Modeling Assistant models, expand Python environment. You can see the default Python environment (if one exists). To change the default environment for OPL, CPLEX, or CPO models, expand the appropriate environment section according to your model type and follow this same procedure.
  3. Expand the name of your environment, and select a different Python environment.
  4. Optional: To create a new environment:
    1. Select a New environment for Python.
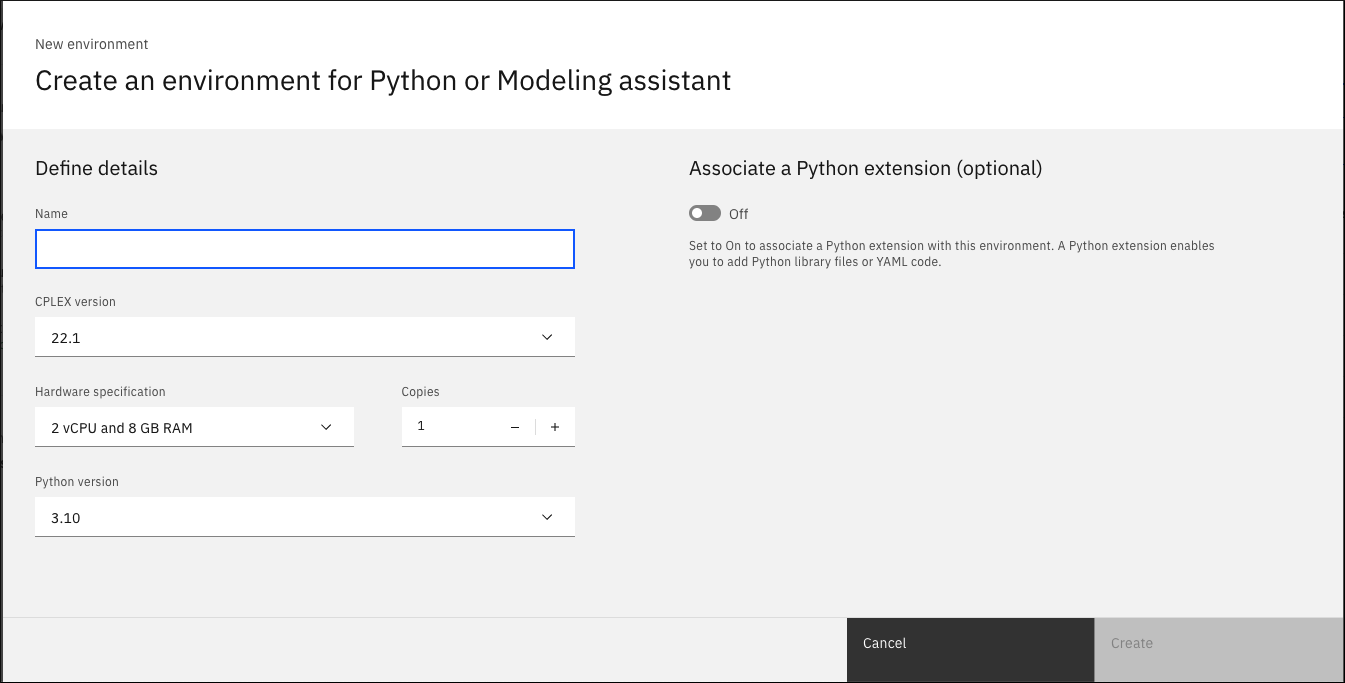
      A new window opens for you to define your new environment. New environment window showing empty fields
    2. Enter a name, and select a CPLEX version, hardware specification, copies (number of nodes), and the Python version.
    3. Set Associate a Python extension to On to include any Python libraries that you want to add.
    4. Click New Python extension.
    5. Enter a name for your extension in the new Create a Python extension window that opens, and click Create.
    6. In the new Configure Python extension window that opens, you can set YAML code to On and enter or edit the provided YAML code.
      For example, use the provided template to add the custom libraries:
      # Modify the following content to add a software customization to an environment.
      # To remove an existing customization, delete the entire content and click Apply.
      
      # Add conda channels on a new line after defaults, indented by two spaces and a hyphen.
      channels:
        - defaults
      
      # To add packages through conda or pip, remove the comment on the following line.
      # dependencies:
      
      # Add conda packages here, indented by two spaces and a hyphen.
      # Remove the comment on the following line and replace sample package name with your package name:
      #  - a_conda_package=1.0
      
      # Add pip packages here, indented by four spaces and a hyphen.
      # Remove the comments on the following lines  and replace sample package name with your package name.
      #  - pip:
      #    - a_pip_package==1.0

      You can also click Browse to add any Python libraries.

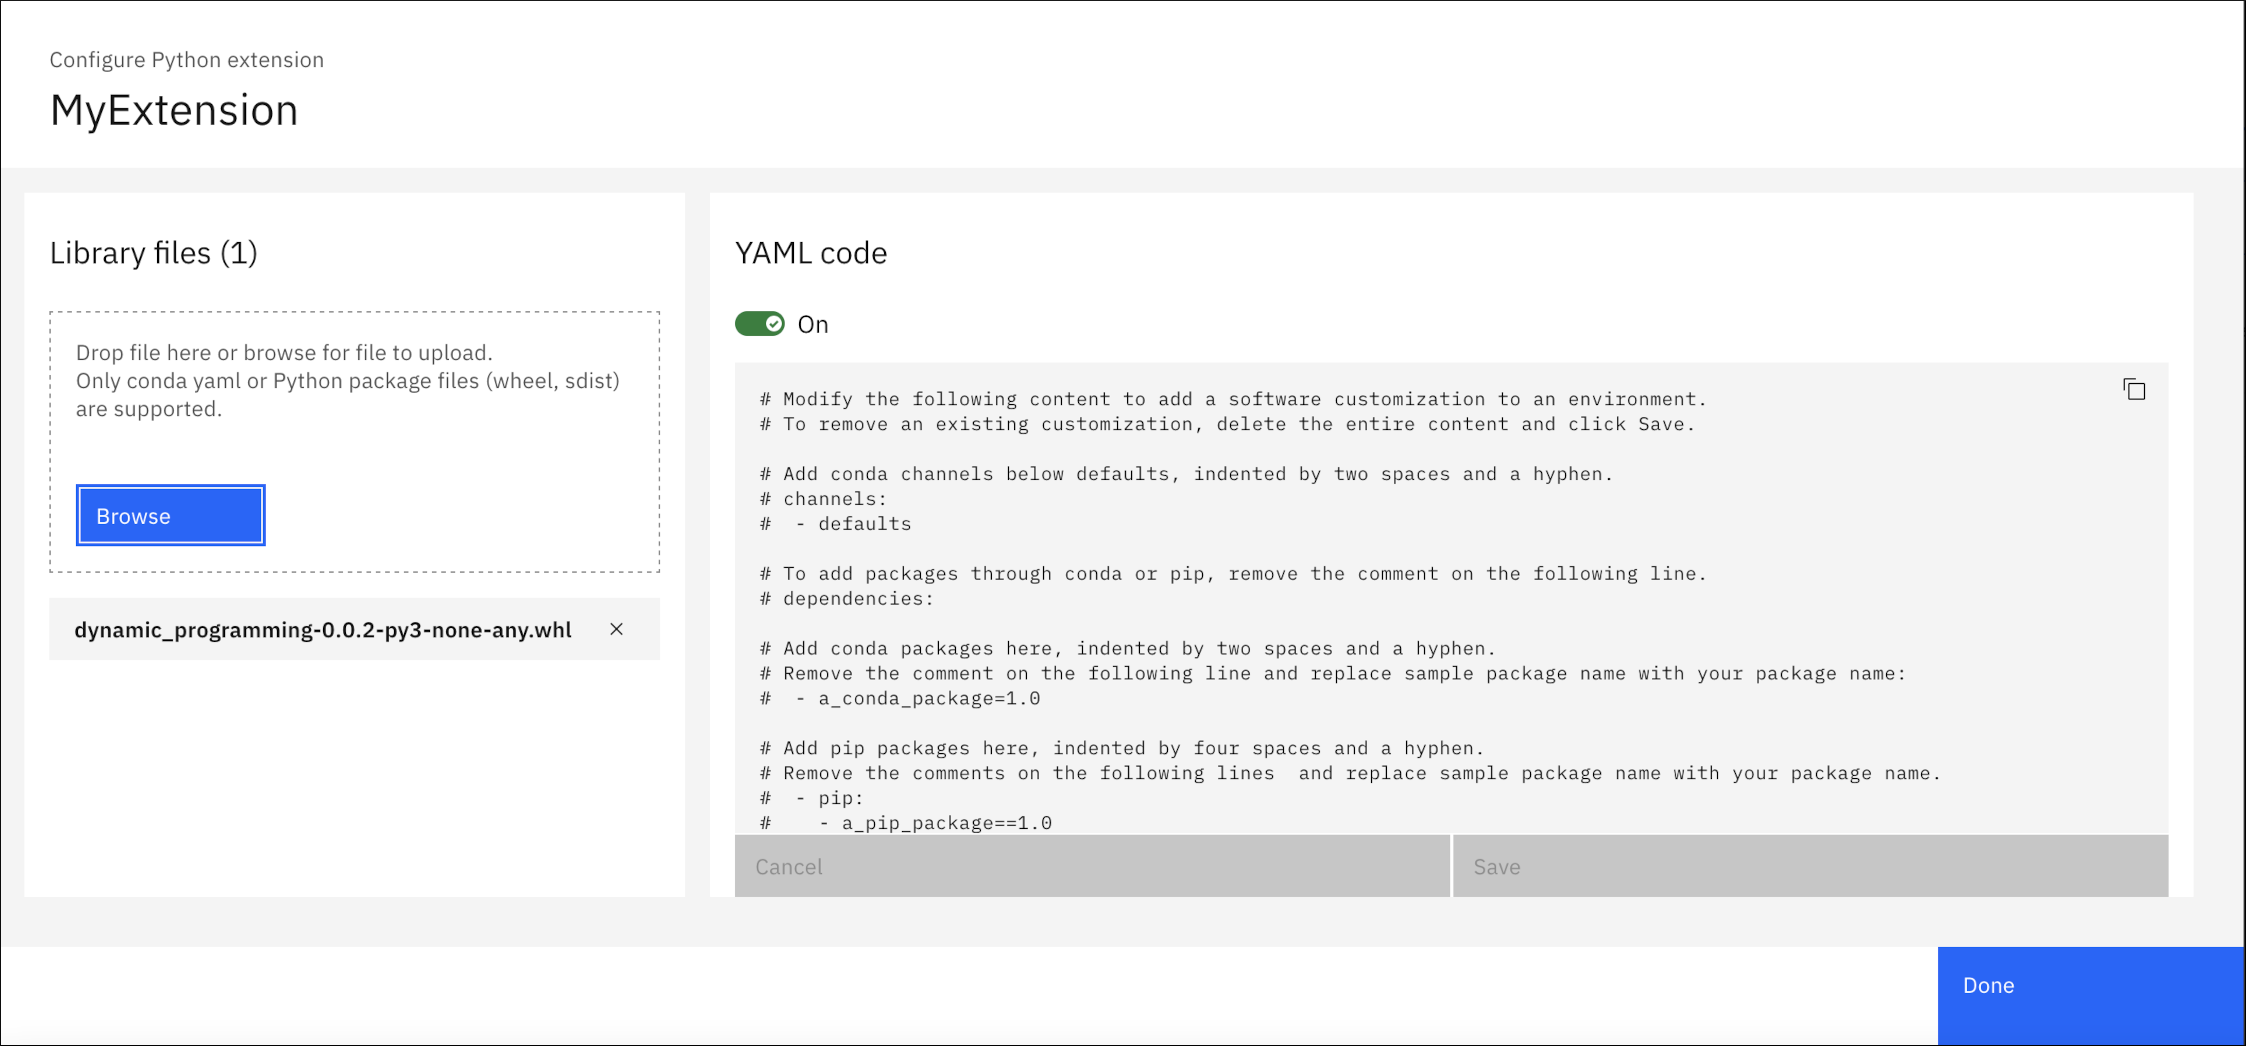
      For example, this image shows a dynamic programming Python library that is imported and YAML code set to On.Configure Python extension window showing YAML code and a Dynamic Programming library included

      If necessary, modify the YAML code and click Save.

      Click Done.

    7. Click Create in the New environment window.
  5. Optional: Select Manage experiment environments to see a detailed list of all existing environments for your experiment in the Environments tab.
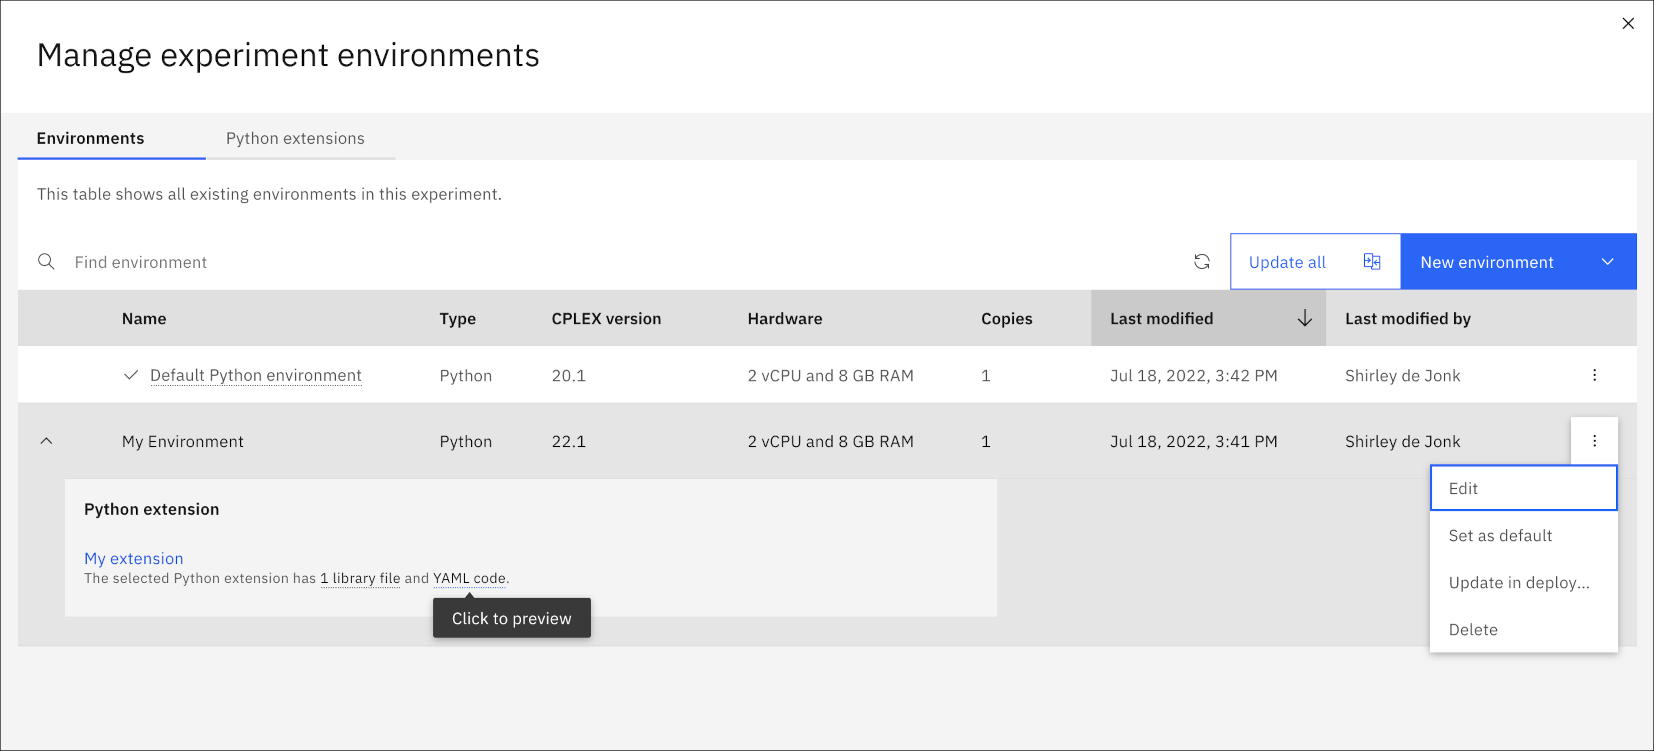
    Manage experiment environment with two environments and drop-down menu.

    You can use the options that are provided by clicking the 3 dot icon menu icon next to an environment. You can choose to Edit, Set as default, Update in deployment space or Delete the environment. You can also create a New environment from the Manage experiment environments window, but creating a new environment from this window does not make it the default unless you explicitly set is as the default.

  6. Click the Python extensions tab.

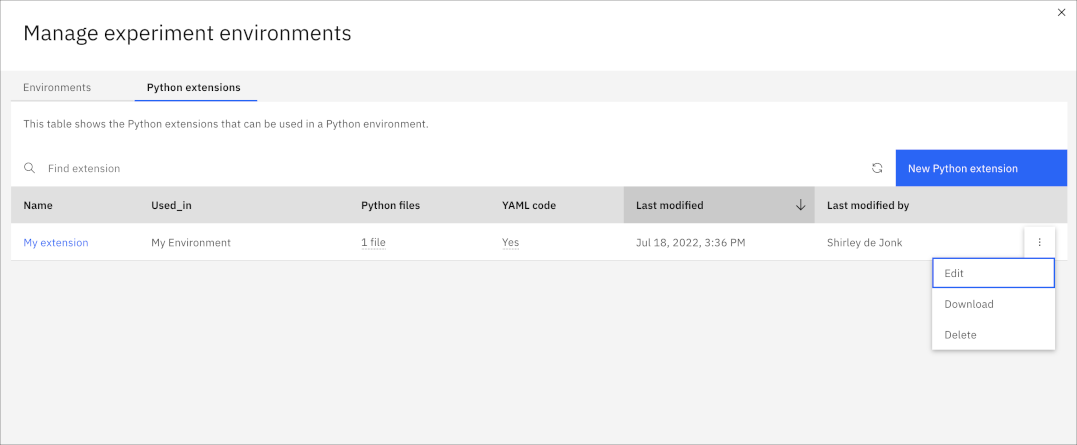
    Python extensions tab showing created extension

    Here you can view your Python extensions and see which environment an extension is used in. You can also create a New Python extension or use the options to Edit, Download, and Delete existing ones. You can also click the extension name to configure it. If you edit a Python extension that is used by an experiment environment, the environment is re-created.

    You can also view your Python environments in your deployment space assets and any Python extensions that you have added appear in the software specification.

Results

Your chosen (or newly created) environment appears as ticked in the Python environments drop-down list in the Environments tab. The tick indicates that this environment is the default Python environment for all scenarios in your experiment.

Example

See the EnvironmentAndExtension example in the Model_Builder folder of the DO-samples in the Decision Optimization GitHub. This example uses an environment with an extension that contains a library file and YAML code.
Generative AI search and answer
These answers are generated by a large language model in watsonx.ai based on content from the product documentation. Learn more